It’s #teamallboy over here, so sometimes the cutesy valentines don’t cut it. By setting aside the pale pink icing for a minute or two, I’ve come up with a sports themed valentine set for those athletic kiddos and the sweet sayings to match!

Here is a quick rundown on how to make these football and baseball valentine cookies, if you’d like to create some for your little sport!
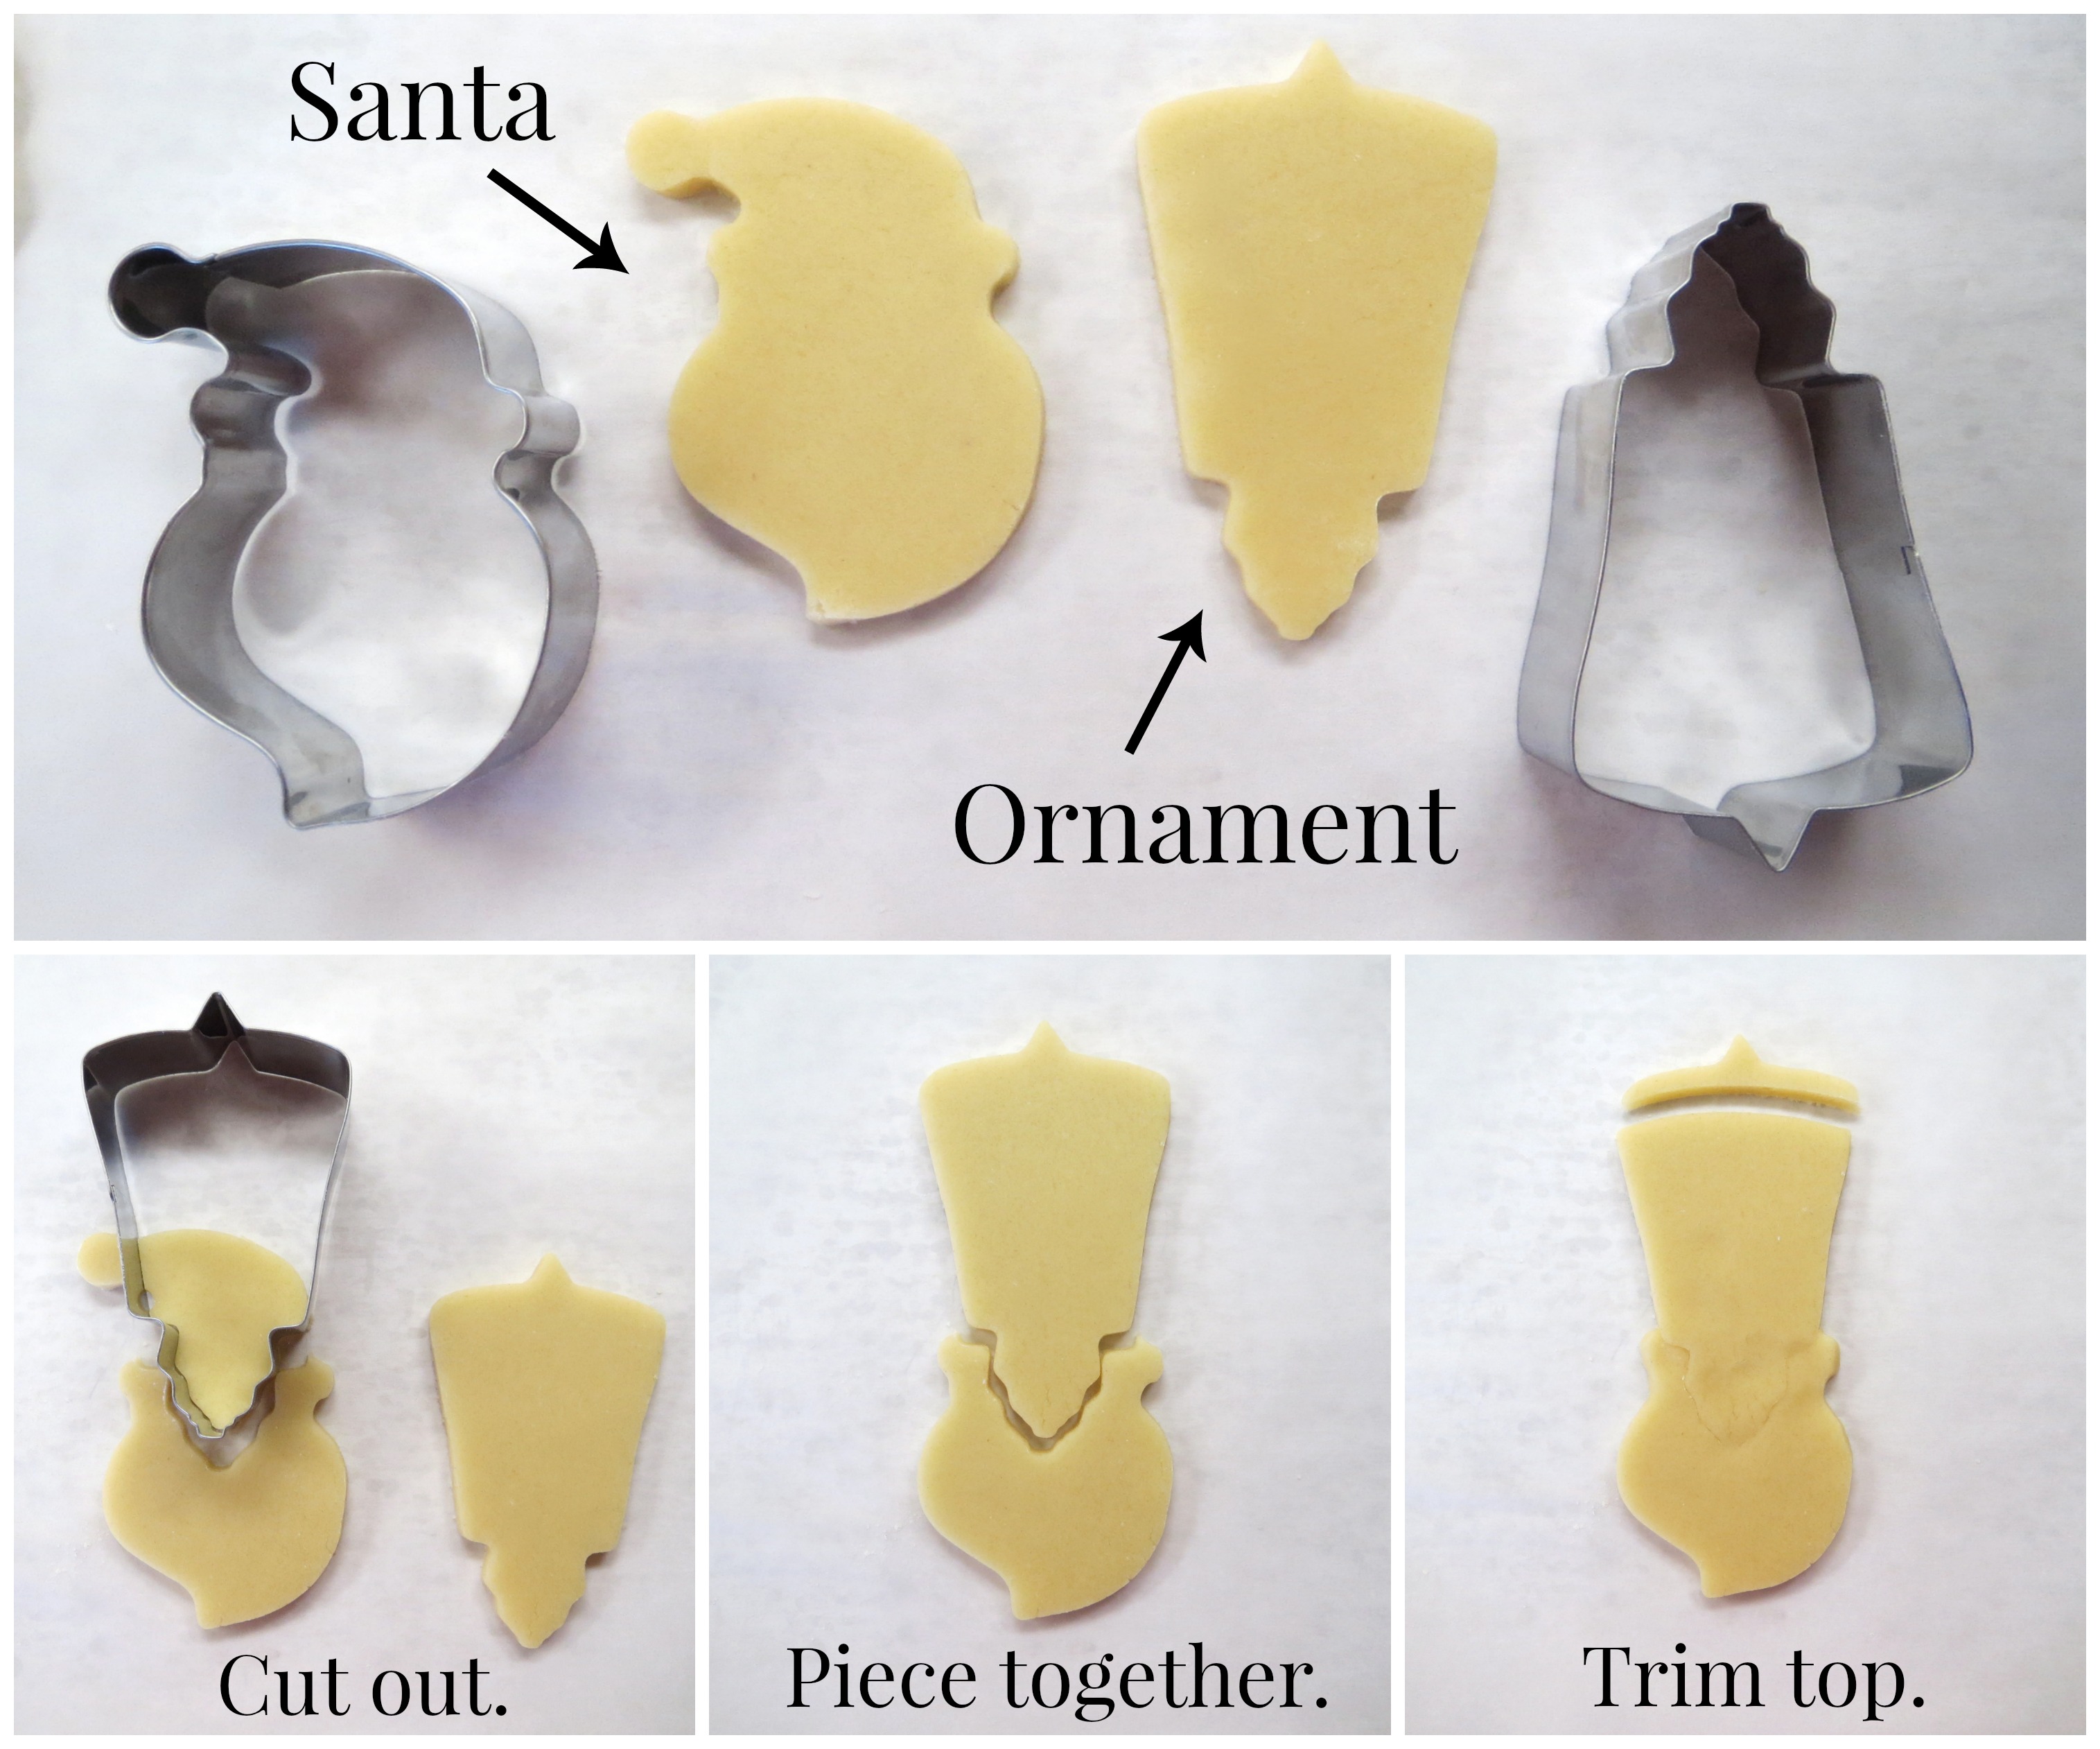
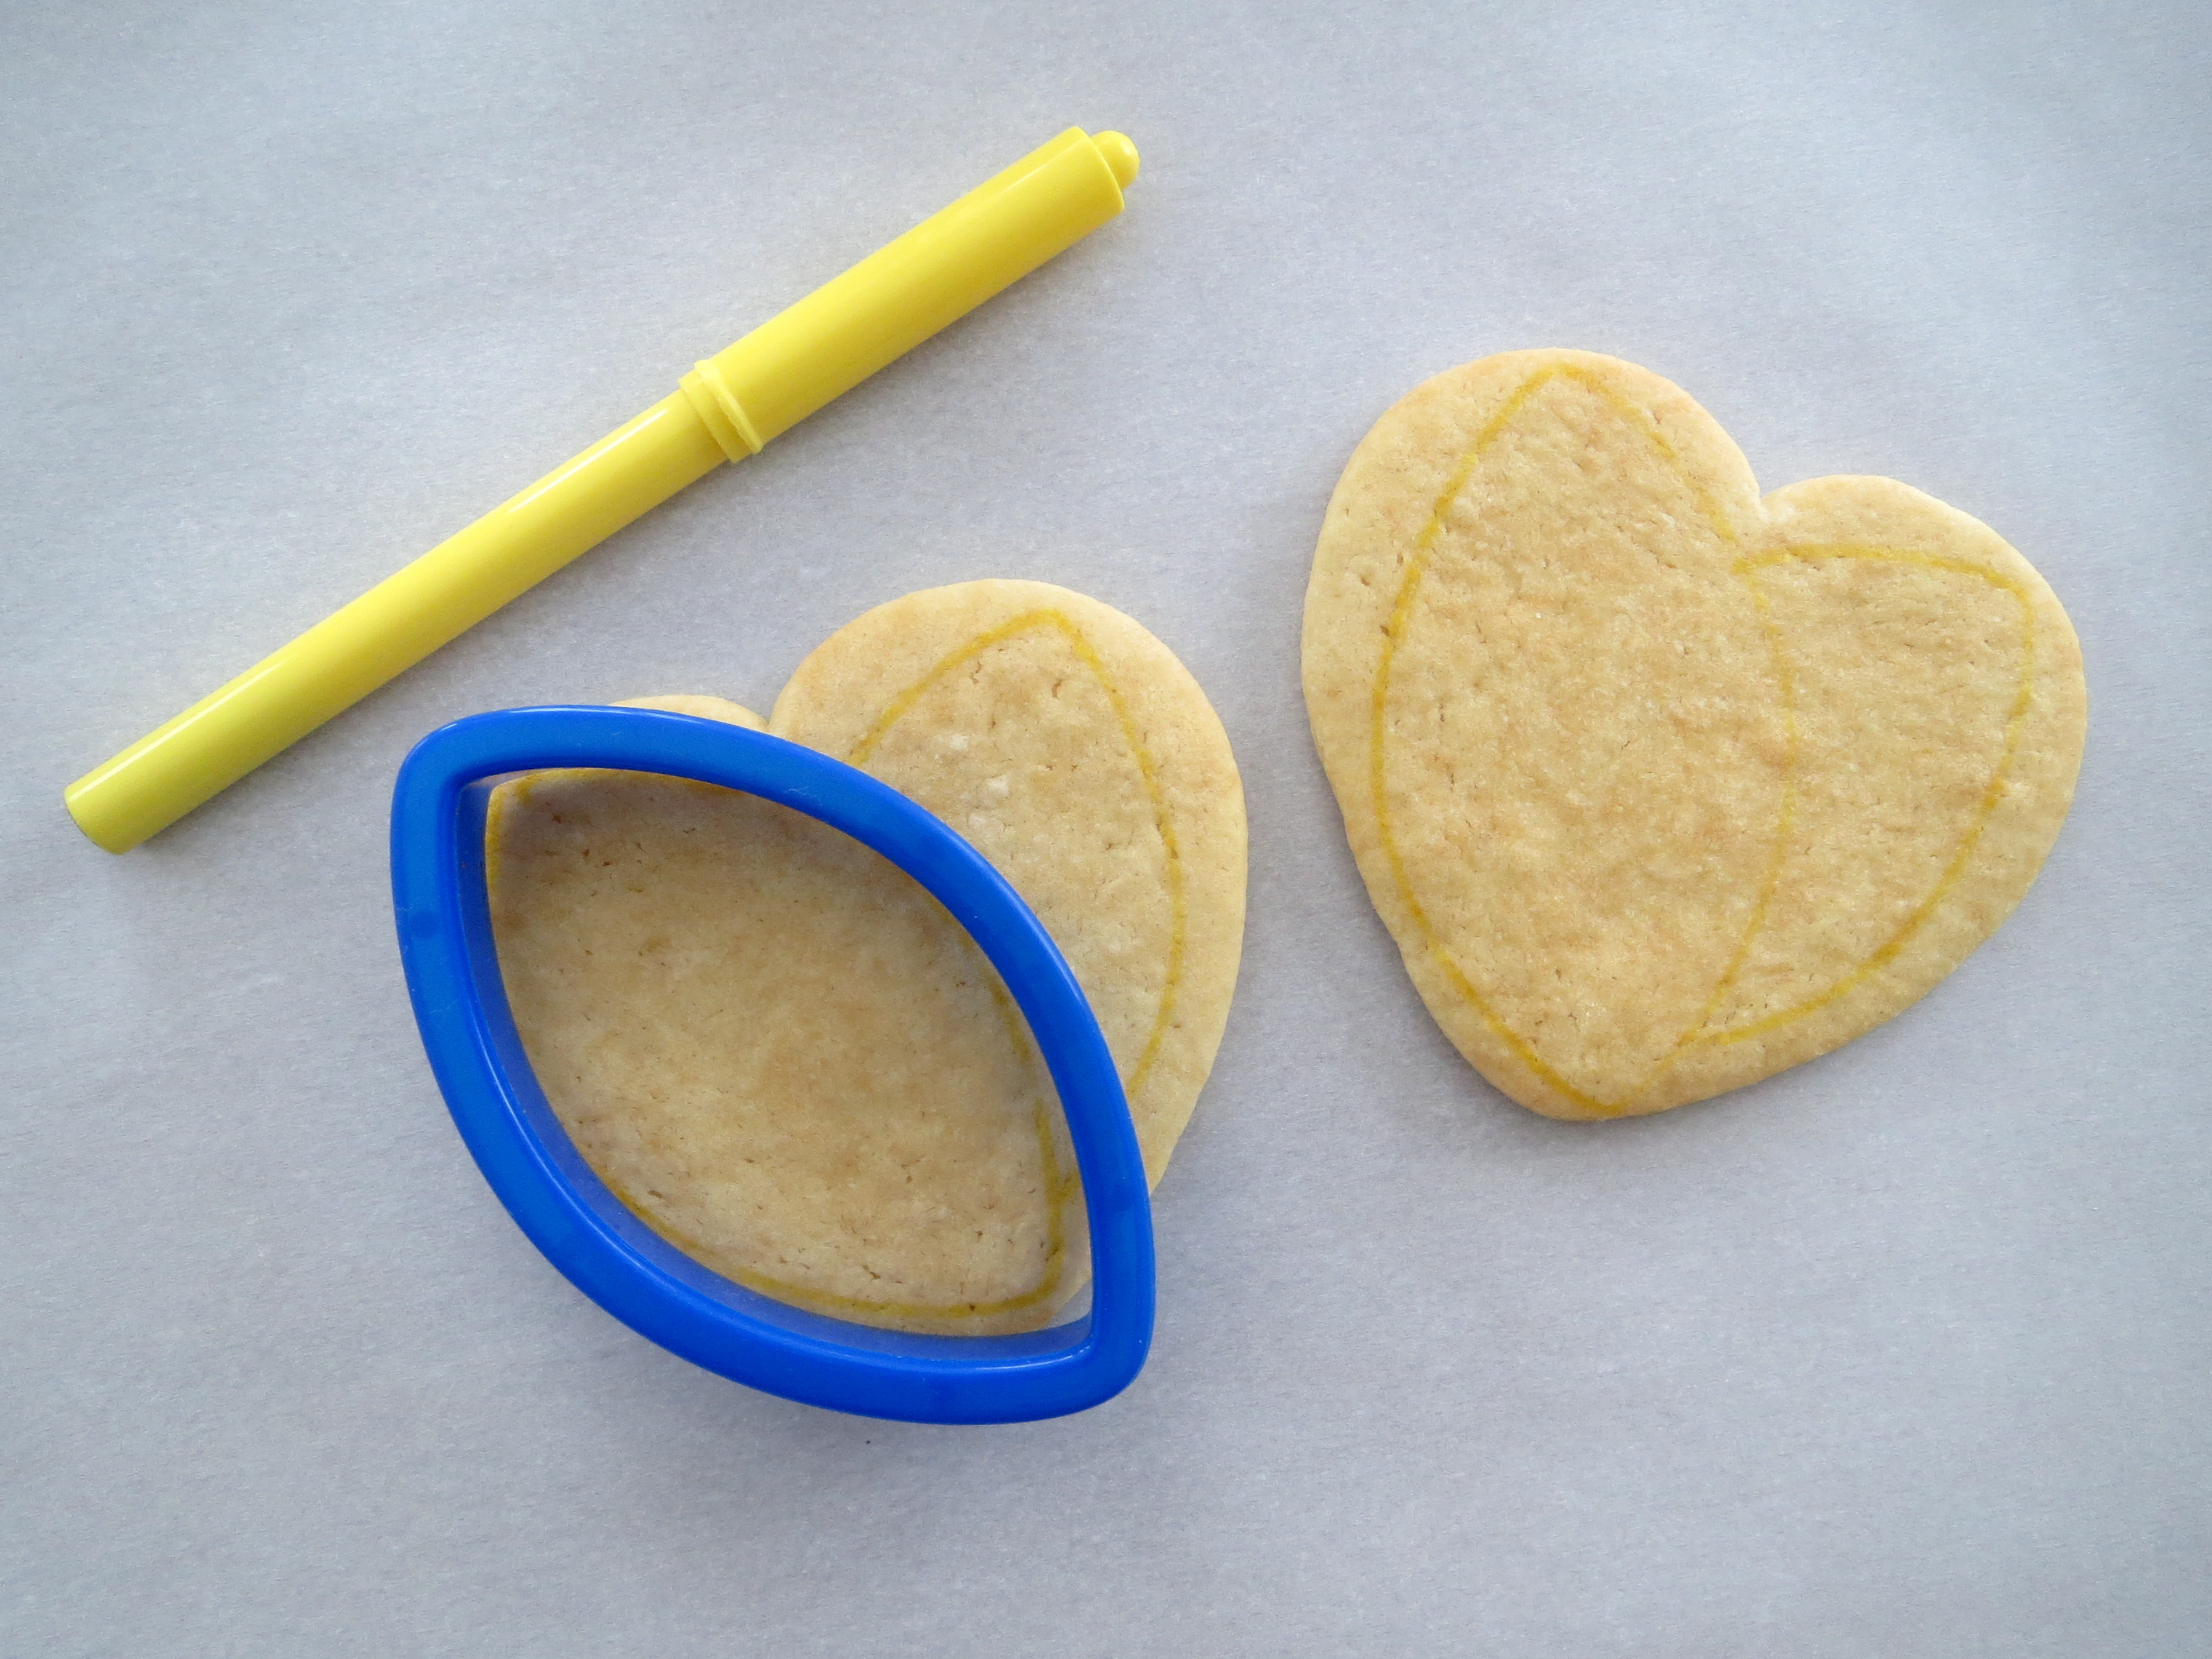
For the football valentine, I started with a large, 4 inch heart cookie. Using a football cutter as a guide, I traced its shape onto my cookie at two different angles.
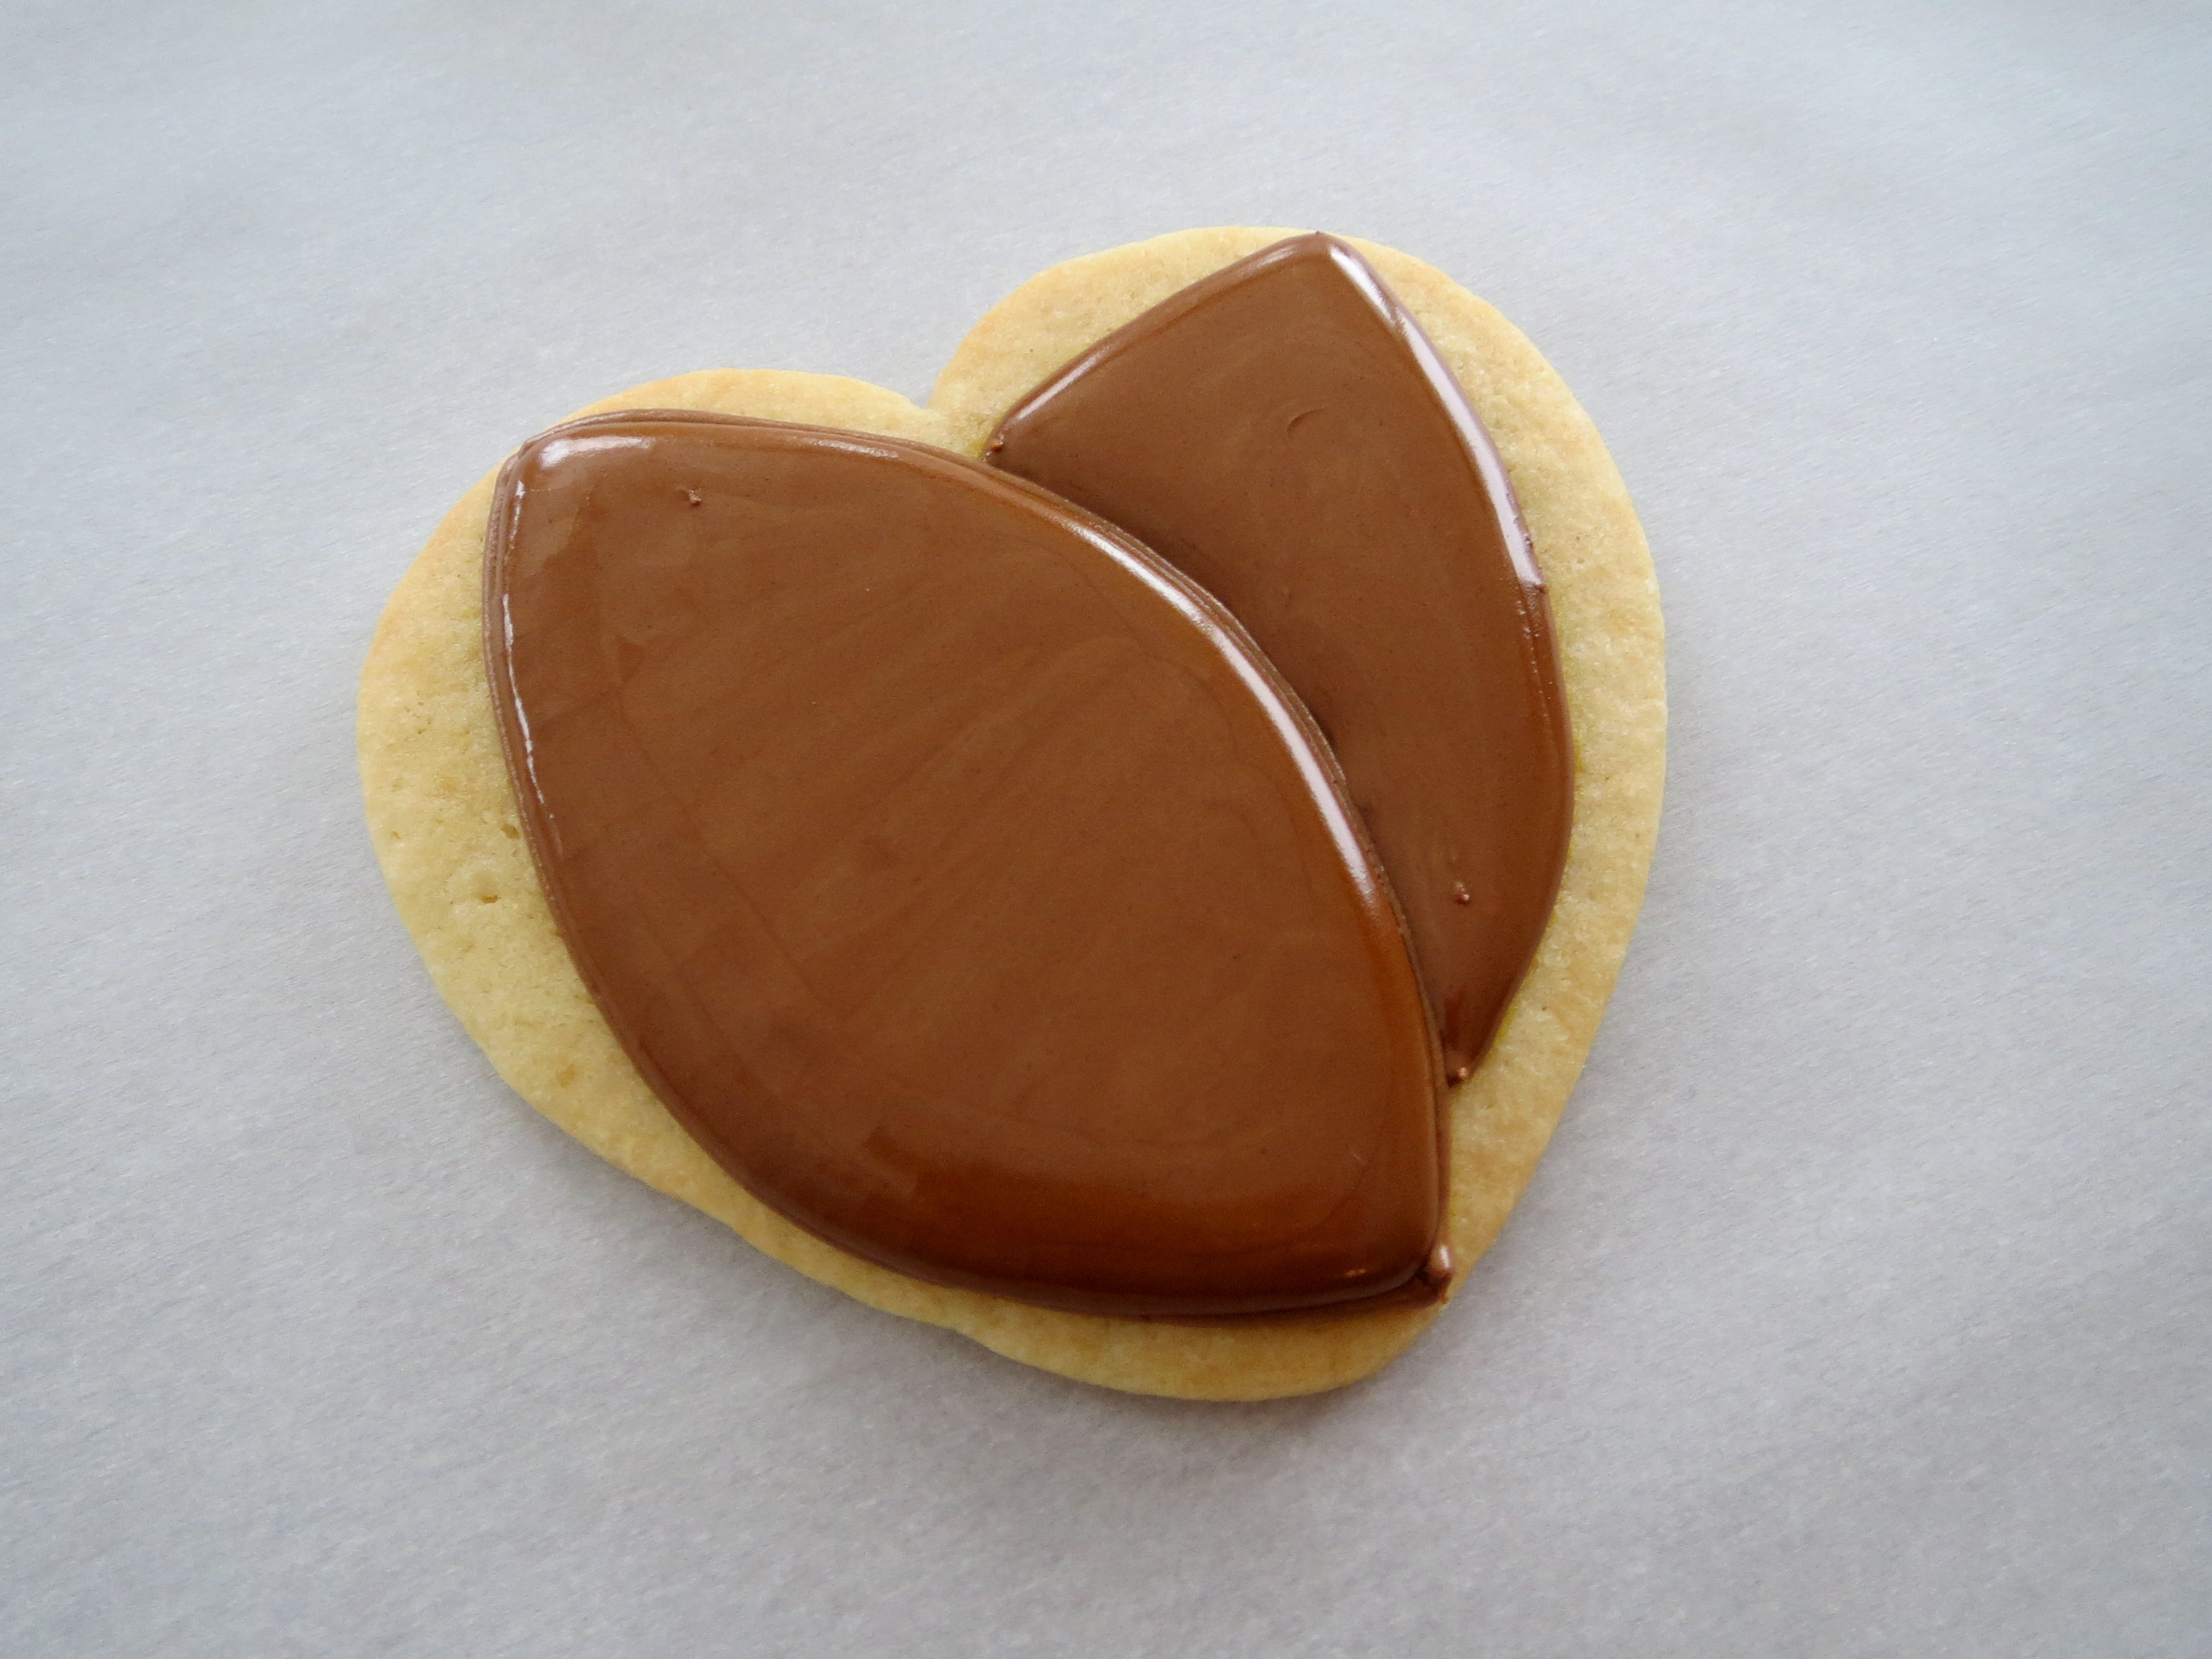
Next pipe over the marked lines with a thick, brown icing. Flood the footballs with a looser consistency of brown, waiting a bit between the two, so the icing will stay segmented.

Once the icing has dried, add stitching details. Make a line down the center in white and pipe little hearts. I couldn’t decide which I liked better, only one heart in red or the lot of them, so I made cookies using each technique.
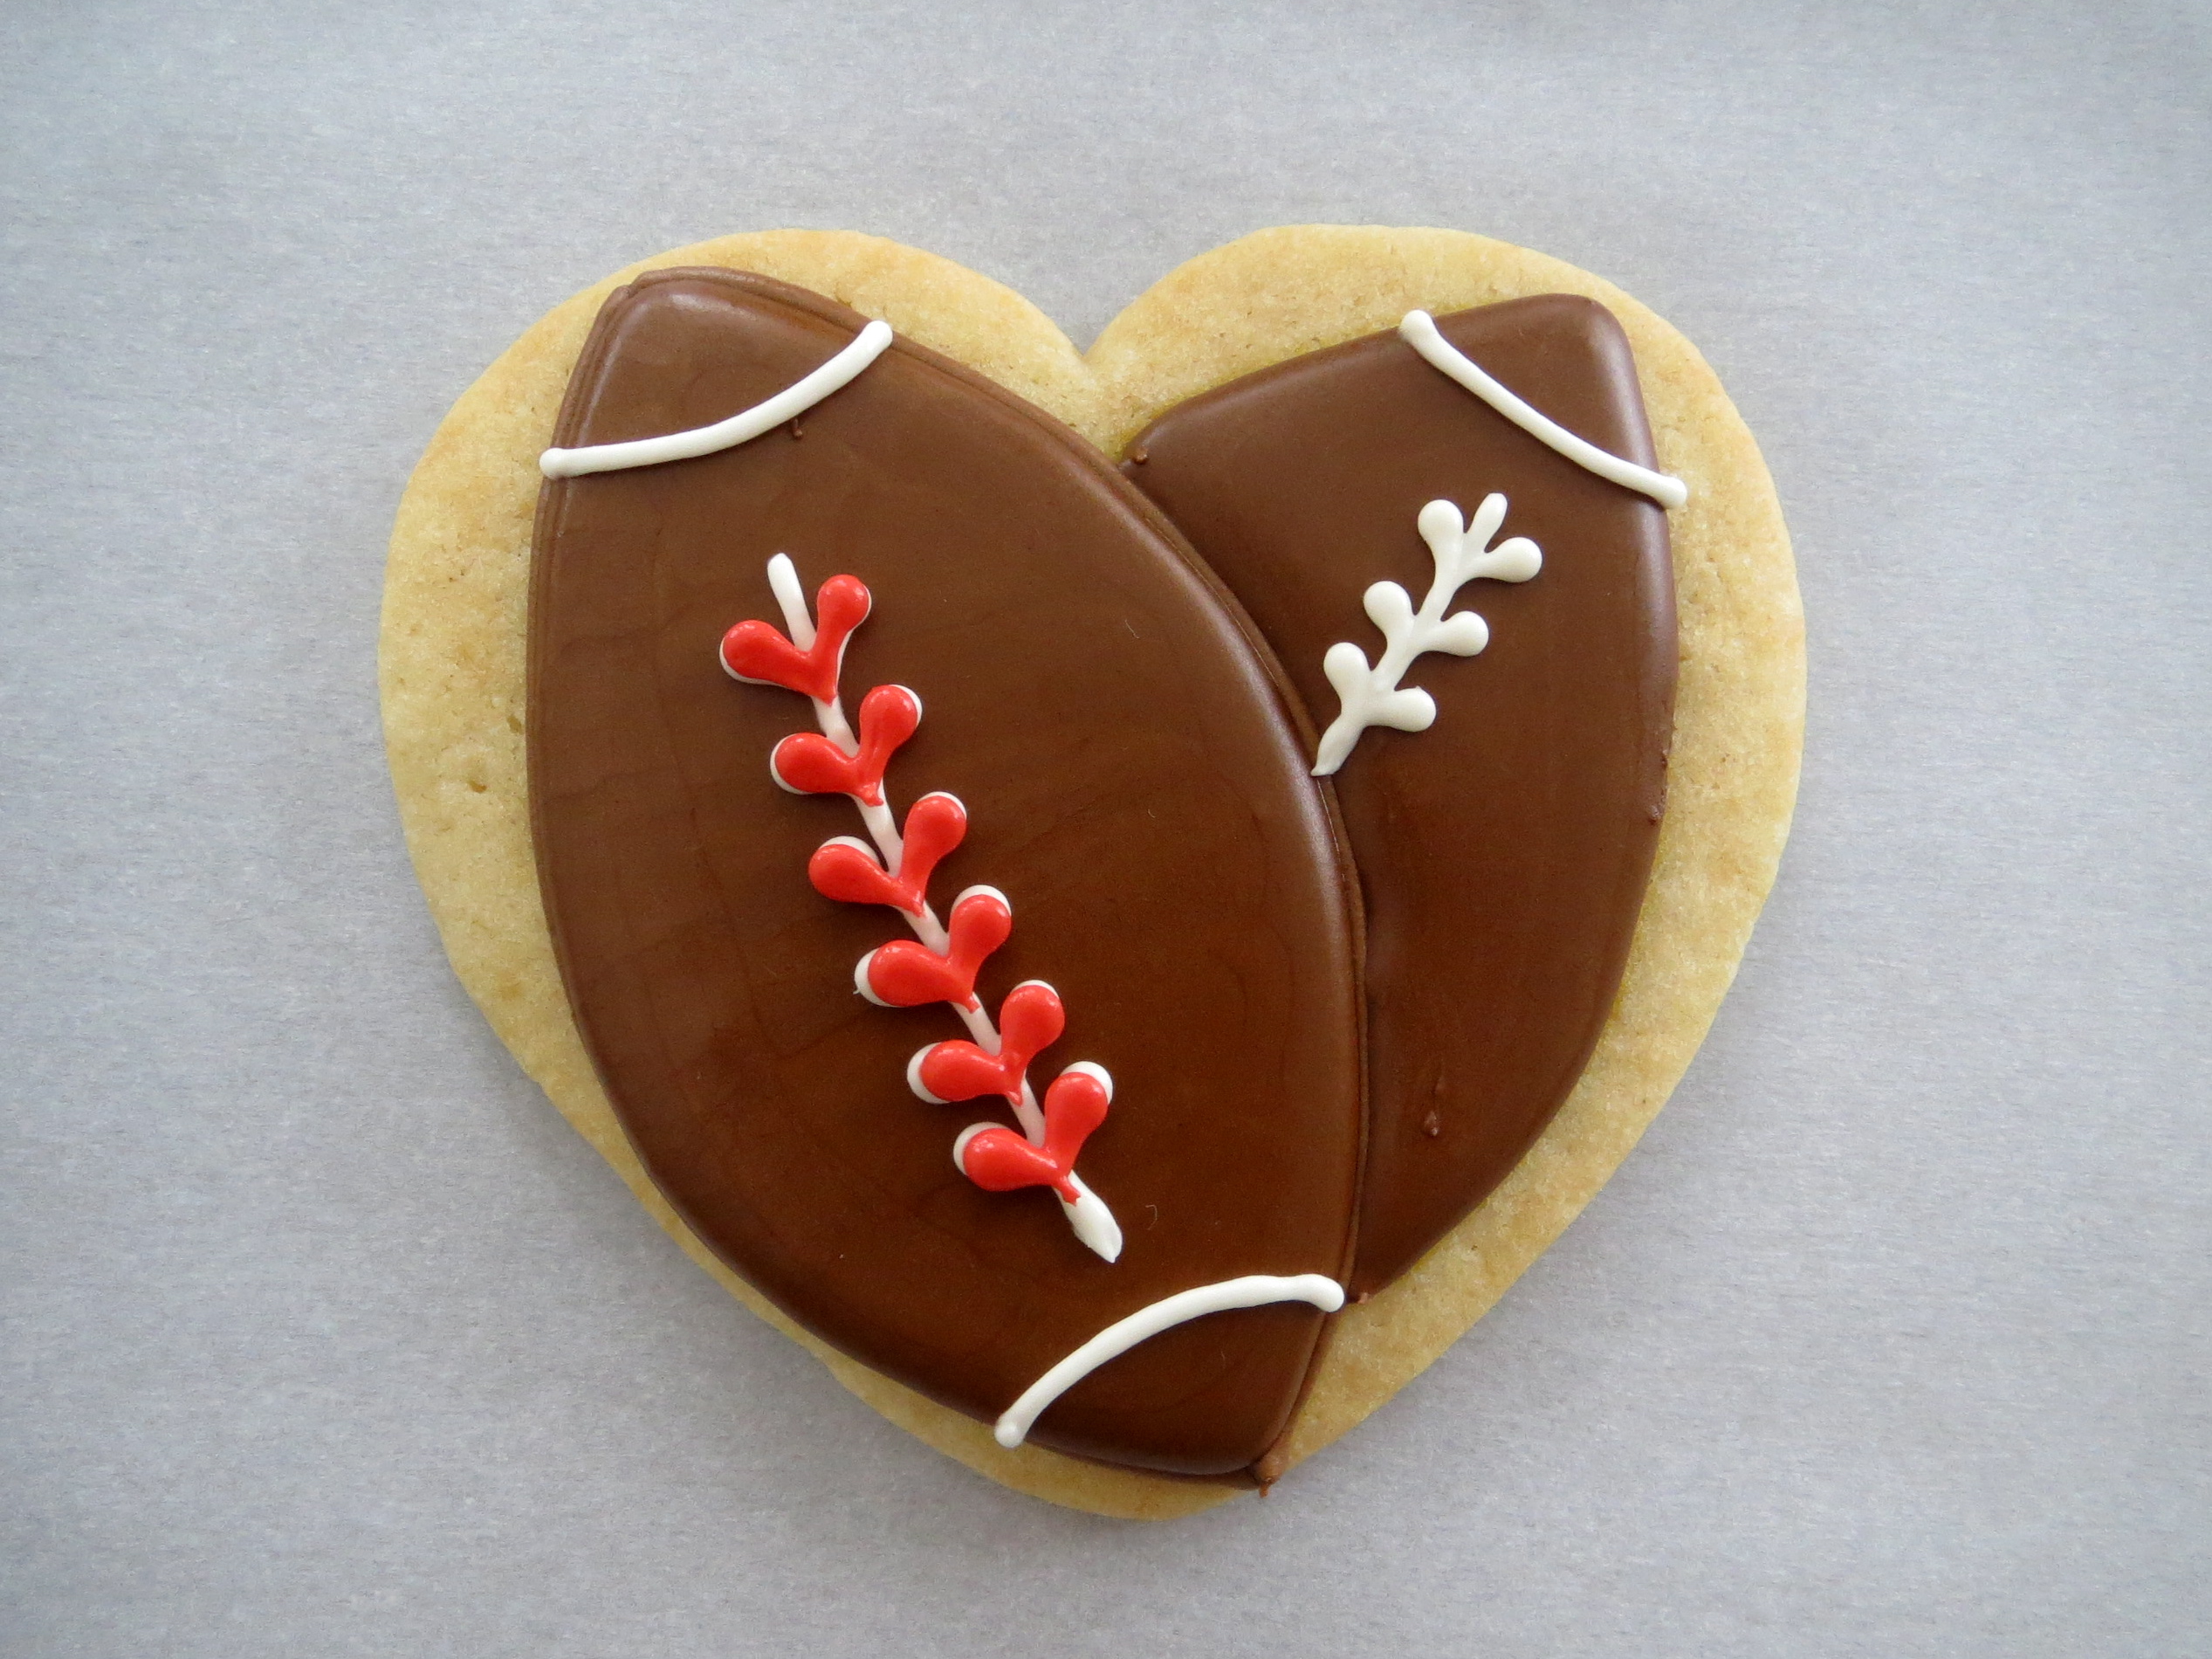
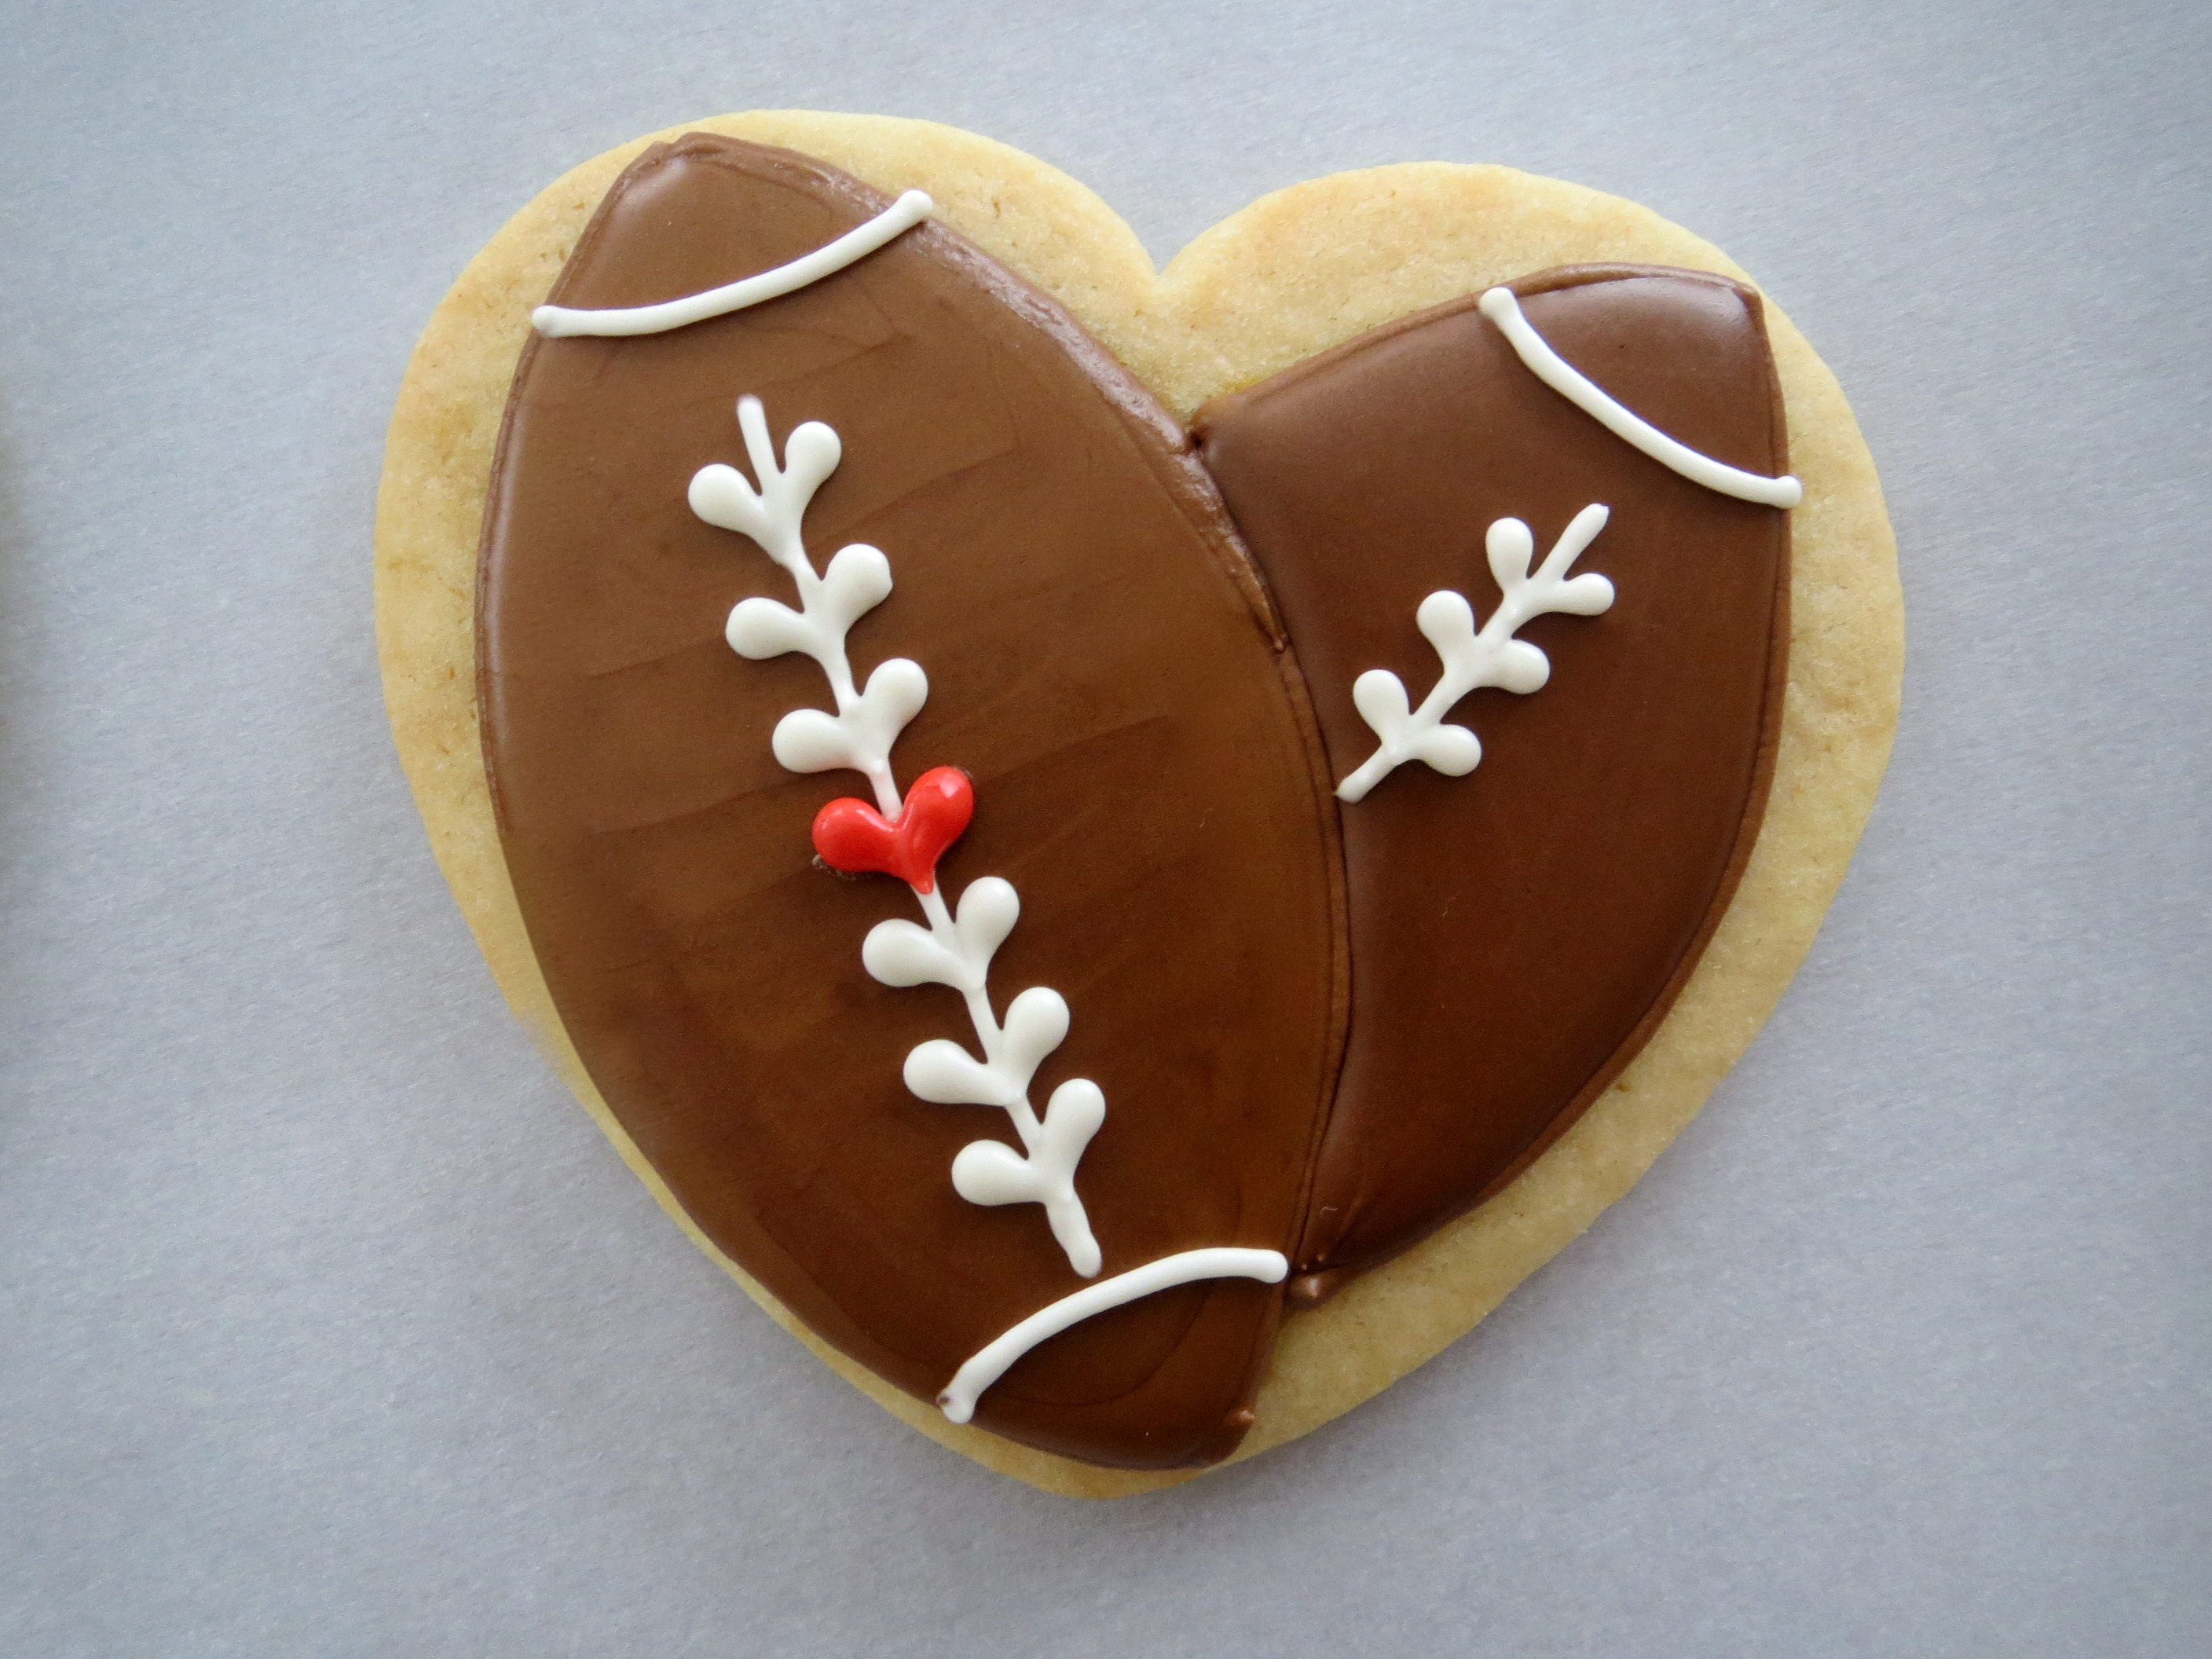
Football valentine cookies…touchdown!

The other football themed valentine cookie was made with the same large, heart shape. I don’t have a breakdown of photos showing how I created them (my bad), but they are pretty self-explanatory.
Start with a green base coat and let set. Outline the heart using the same green icing. Pipe your “plays”, making sure to add “XOXO” and hearts in the correct positions. Next draw directional arrows with an edible marker. I used the FooDoodler brand for these because they have a nice fine tip.

Another football valentine cookie…score!

And finally, a baseball valentine cookie. I’ve been saving this idea since last year and it couldn’t be easier!
Ice a round cookie in white. Once it is fully dry, make curved lines using a red FooDoodler. The lines will act as a guide for the heart shaped stitching. Remember that a stiffer icing for details will hold its shape better, especially for these tiny hearts.
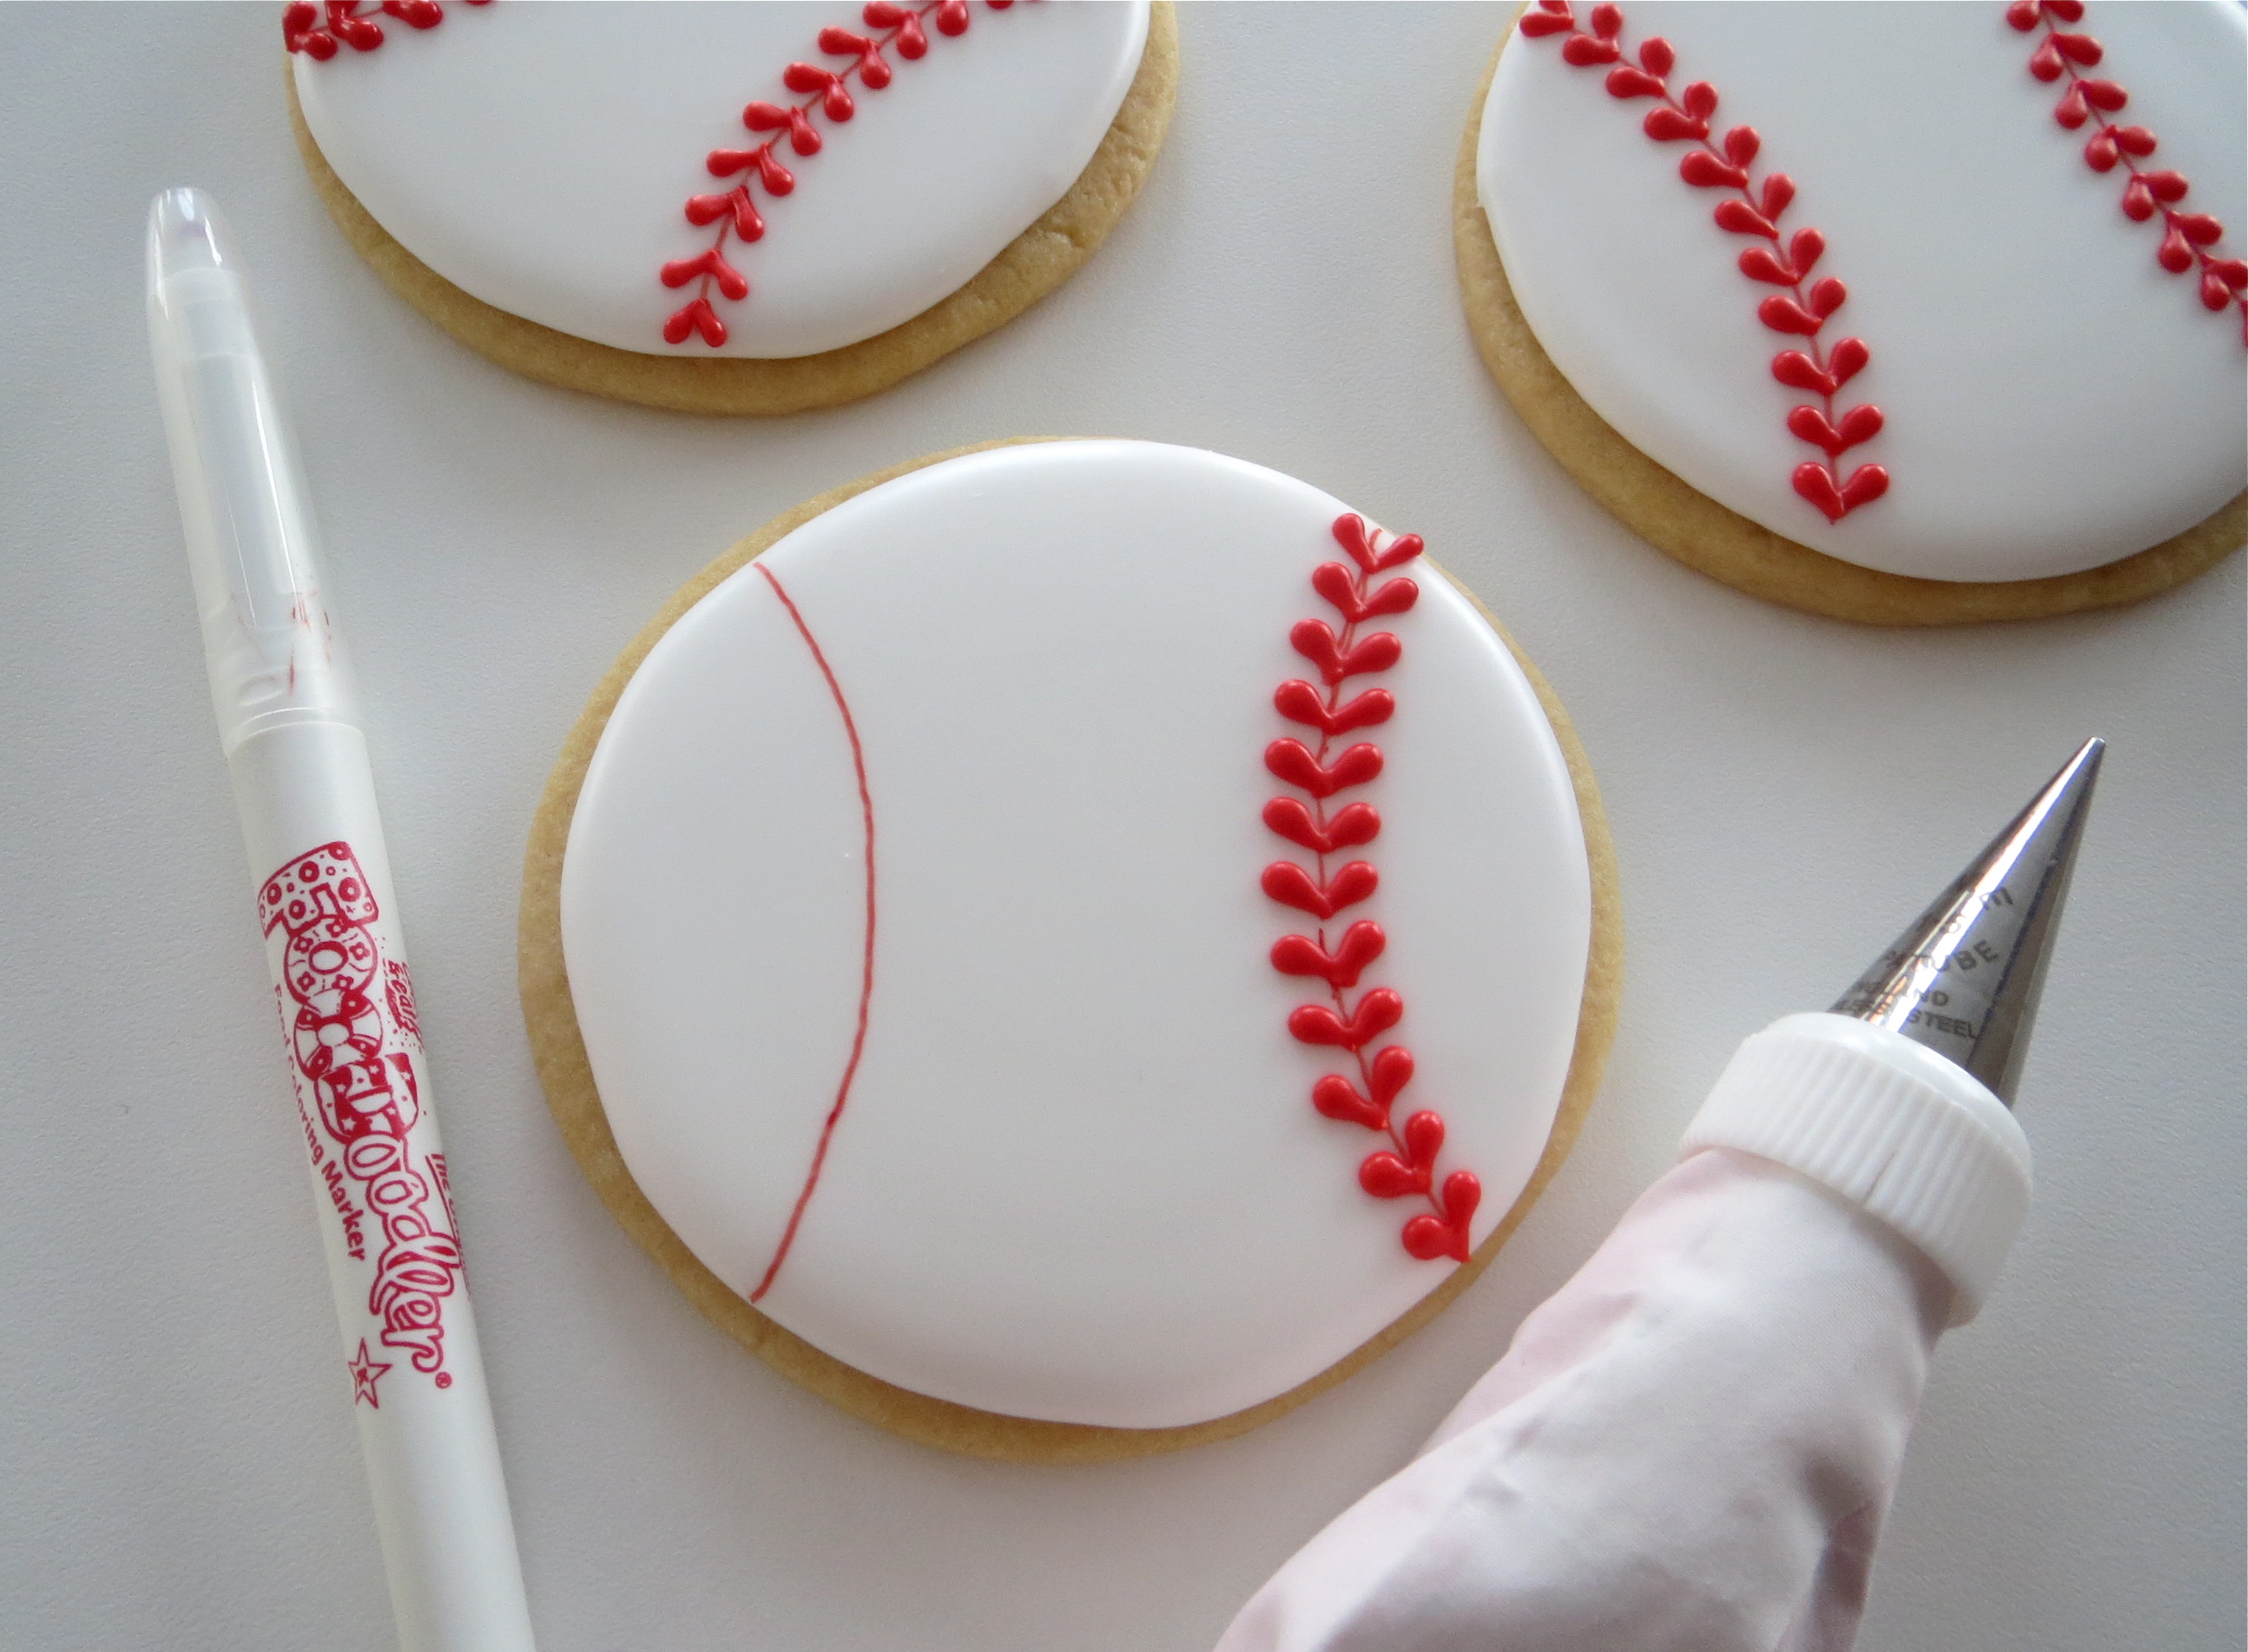
Baseball valentine cookies…home run!

My plan now is to have my dear, sweet husband create printable bag toppers to go with these sporty valentine cookies, which will make them perfect for classroom treats. Let’s talk him into that so I can share with you here, shall we? 😉
Valentine cookies for the sports lover…it’s definitely a WIN!
(This post linked to Kitchen Fun with My 3 Sons)