Ever since I created and posted this flower cookie platter, I’ve had lots questions regarding it. It’s so easy, you guys, and the design came to me at the last minute. I don’t know how or why this works, but in this case it did! Due to all of your inquiries (thanks for asking!), I wrote up a tutorial to hopefully answer your questions.

I initially created this set for teacher appreciation week, but it could be easily adapted to fulfill any gathering of hungry cookie monsters. It’s a quick design capable of feeding a lot of people, and when you’re pressed for time to create something lovely, this easy flower platter can be the perfect solution!

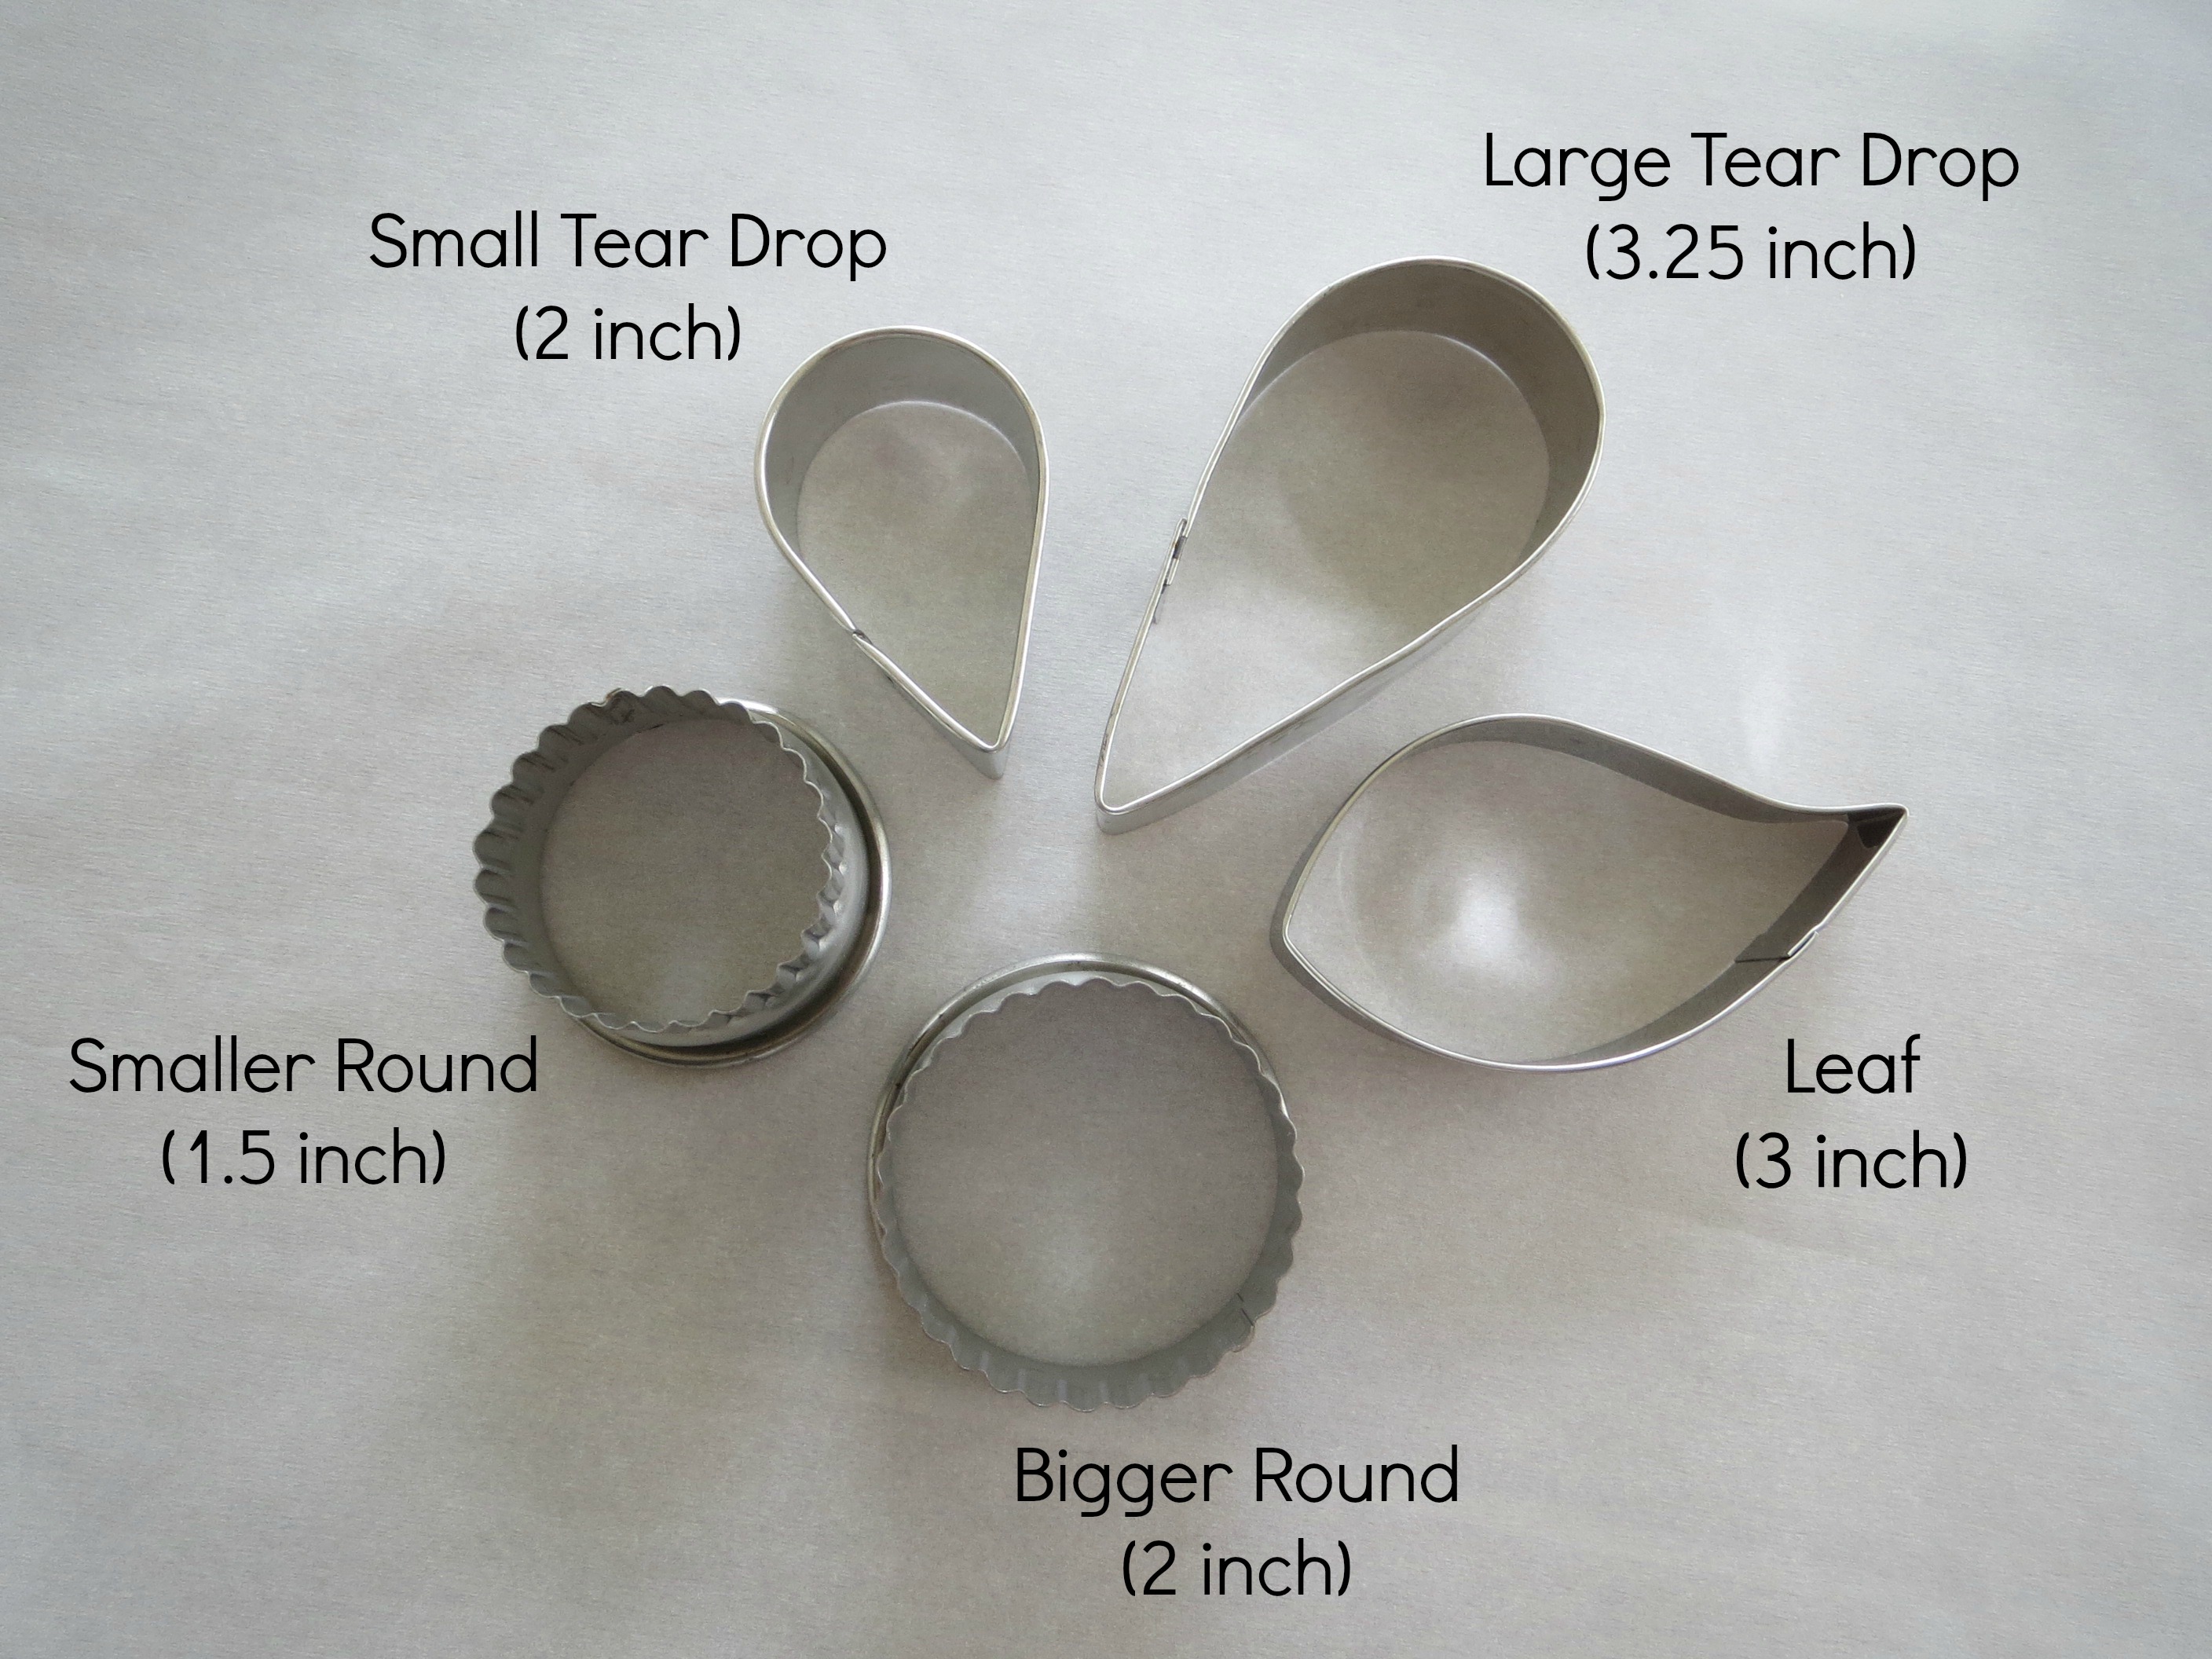
The most frequently asked question I received was what cookie cutter did I used for the petals. They are pictured below: a large, 3.25 inch tear drop and a mini, 2 inch tear drop. The platter’s center cookies were made with a 1.5 inch and 2 inch scalloped round cutter (but any round would do), and a few accent cookies created with a 3 inch leaf cutter.
I knew that I wanted the design to have an ombré effect, so I started with 3/4 cup of royal icing in a dark shade and flooded it on about 10 mini tear drop cookies. Half of the mini iced cookies I sprinkled with sanding sugar and half I left without.
After the mini cookies were complete, I added a 1/4 cup white RI to the color I had left in my pastry bag to get a lighter shade, and decorated 8 to 10 of the large tear drop cookies. Again, half of the large cookies I sprinkled with sanding sugar and half I detailed using a simple swirl (*save a bit of your darkest icing for the swirl!). I continued with a white RI addition to the remaining color after each group of 8 to 10 cookies, in order to create that ombré look once the cookie platter was assembled.

I also made the flower’s center cookies in yellow, as well as a few green leaves for accents using sanding sugar, nonpareils and a simple swirl, to add a variety of textures.

Let the whole set of decorated cookies dry overnight.
When ready, I arranged the individual cookies starting with the outside petals first and worked my way in towards the center. It takes a bit of patience, stacking and messing around with the cookies to get them just right, but you will be so happy with the result!
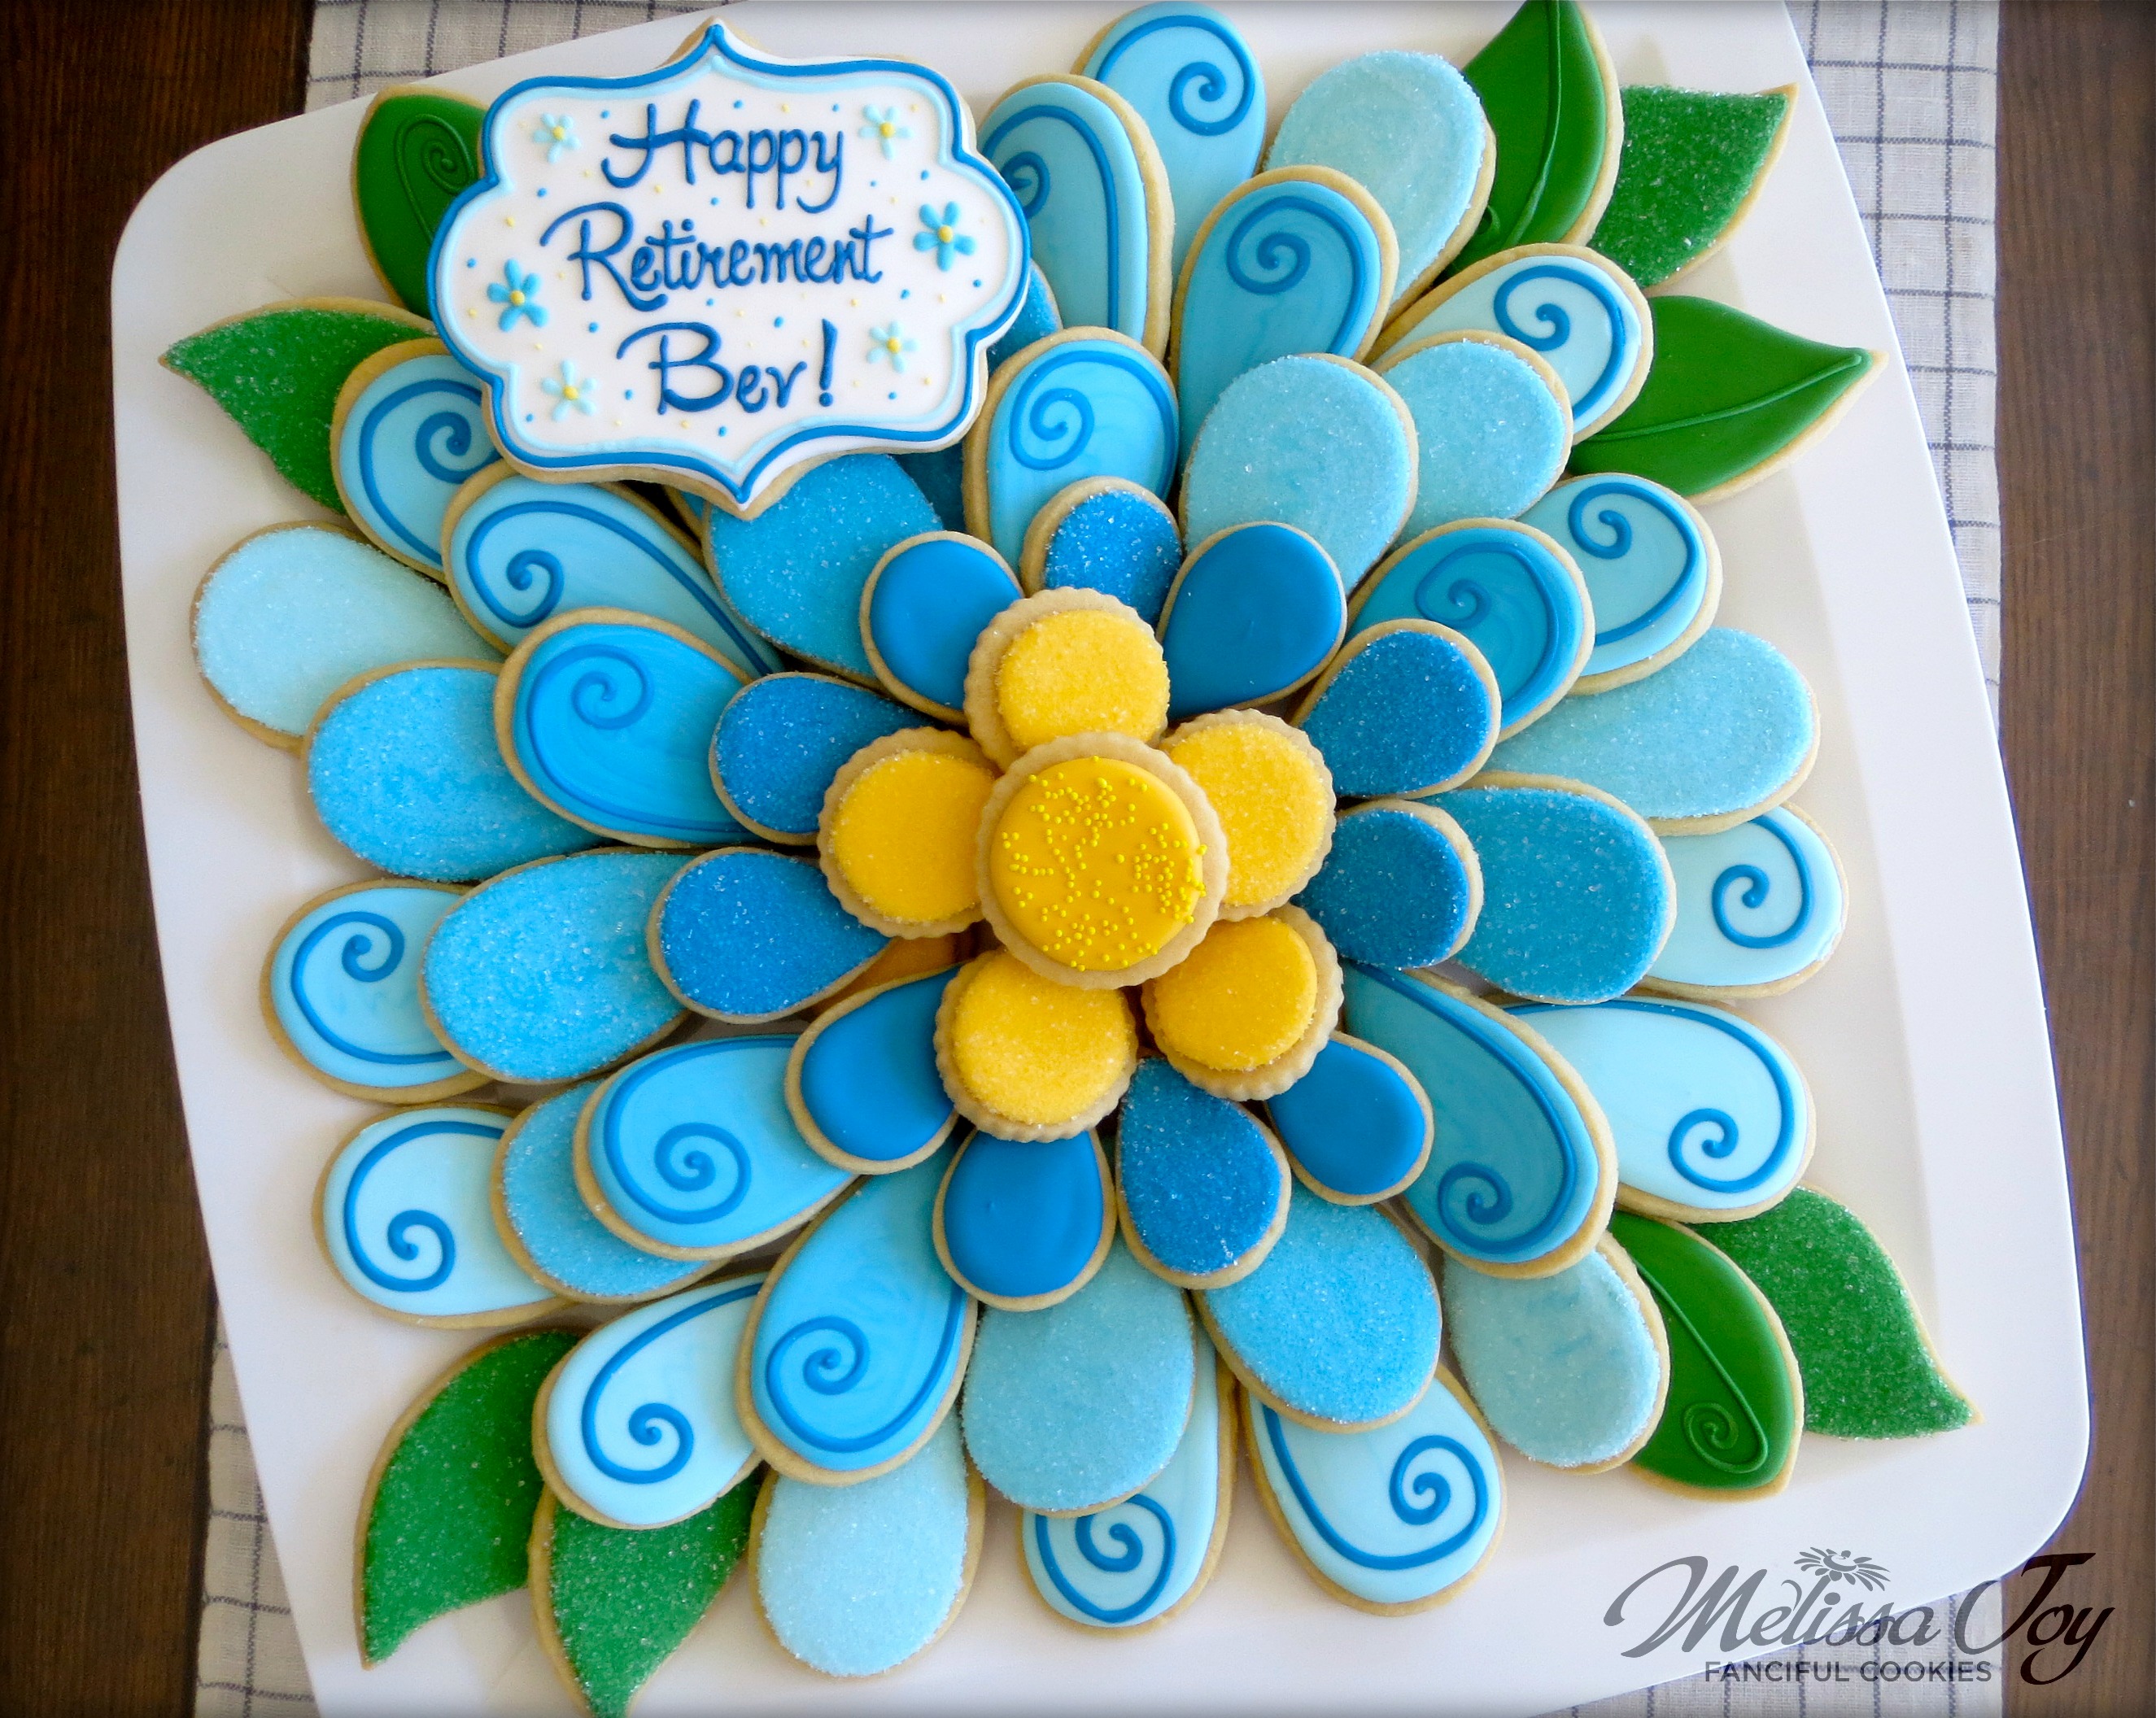
For this particular platter, I used approximately 60 cookies. It’s just as easy to arrange a flower set on two smaller plates using 30 cookies each, but I guess it just depends on what you need. I also added a 5 inch plaque cookie to these sets, because I like to bust out Mabel, my kopykake projector, and get some piping practice in!
![]()
This flower cookie platter is so versatile! It could be used for lots of occasions…baby showers, wedding showers, family reunions…any group would love to be on the receiving end, don’t you think?
If you have any more questions or there is something I’ve missed, feel free to ask in the comment section below.
Happy baking!

Sometimes the simplest designs are the best! Love what you’ve done here 🙂
Thanks, Shanna!
How do you hold the cookies in place once they are arranged? Love the blue platter!
Because they were stacked, they just stayed put! I have heard some people lining their trays with crumpled plastic wrap to keep things in place though. I think for transportation purposes, I would do so for this one!
I can’t find a long skinny teardrop cutter, they are all more short and wide. Do you know who sells the cutters? Beautiful platters
I do see that “Foose” is stamped on that particular cutter, and looking at their website, I don’t see it listed. I don’t remember where exactly I purchased it…sorry! You could contact them directly, or perhaps have one made by one of the many 3D cutter makers out there. I would think the shorter, wider teardrops would be just fine though!
Brilliant! Will definitely try this!!
Thanks a bunch! Let me know if you try it! 🙂
My daughter sent this pin of your cookies. Adorable! It’s snowing today, nothing better to do but bake these cookies. Hope I can get make mine as cute as yours.
I’m sure they will be adorable! Thanks for stopping by the blog! 🙂
How do you write on the cookies so well? Is it a stamp, or just lots of practice?
I use a KopyKake projector for all my lettering with royal icing. I have used stamps in the past, but only because I didn’t own a projector! 🙂 The KK helps tons but it is still a learning curve, like anything is. The more you do it, the better you get!
What a brilliant idea! So pretty and fun! You are awesome for sharing this!
Where do you get the platters you use underneath your pretty cookies?
I actually got them at the grocery store and they were pretty inexpensive! They are plastic, and perfect for customers who may forget to return them. 😉
Where did you get the tear drops and leaf cookie cutters?
“Foose” is stamped on the larger tear drop cutter, but looking at their website, I can’t seem to find it. I don’t remember where exactly I purchased it…sorry! You could contact them directly, or perhaps have one made by one of the many 3D cutter makers out there. I would think the shorter, wider teardrops would be just fine though! The leaf was one from a set of fondant cutters by Wilton.
Would you mind sharing which tip size you used for the writing on the teacher appreciation plaque? Such beautiful work!!
It most likely was a PME 1.5 tip. It is my go-to tip for fonts!
Did you use colored sanding sugar or just white?
I just use white!
Made this platter cookie for my Bestie, Paula’s retirement tomorrow. I added iris violet and lilac colored petals as well, to make it a hydrangea, her favorite 💐 She, and her staff at the bank, were THRILLED!!!
Awesome! I love this design and so happy it worked out for your celebration!
what size of plates do you recommend for both the 30 cookie and the 60 cookie designs?
I think the one that is pictured was maybe 20 inches square.
How in the world do you write so well with icing??? Beautiful! What consistency do you use for writing?
It’s a thicker consistency for sure, I would say not as thick as toothpaste, but sort of close to that?And a projector is what I use for piping letters. I don’t ever do fonts without it! LOL Hope that helps!
What cookie dough and frosting recipe do you use?
My cookie recipe I don’t share, because I sell my cookies, but the icing recipe I use is closest to this one by Sweetopia: https://sweetopia.net/2012/01/royal-icing-recipe-free-illustrated-recipe/