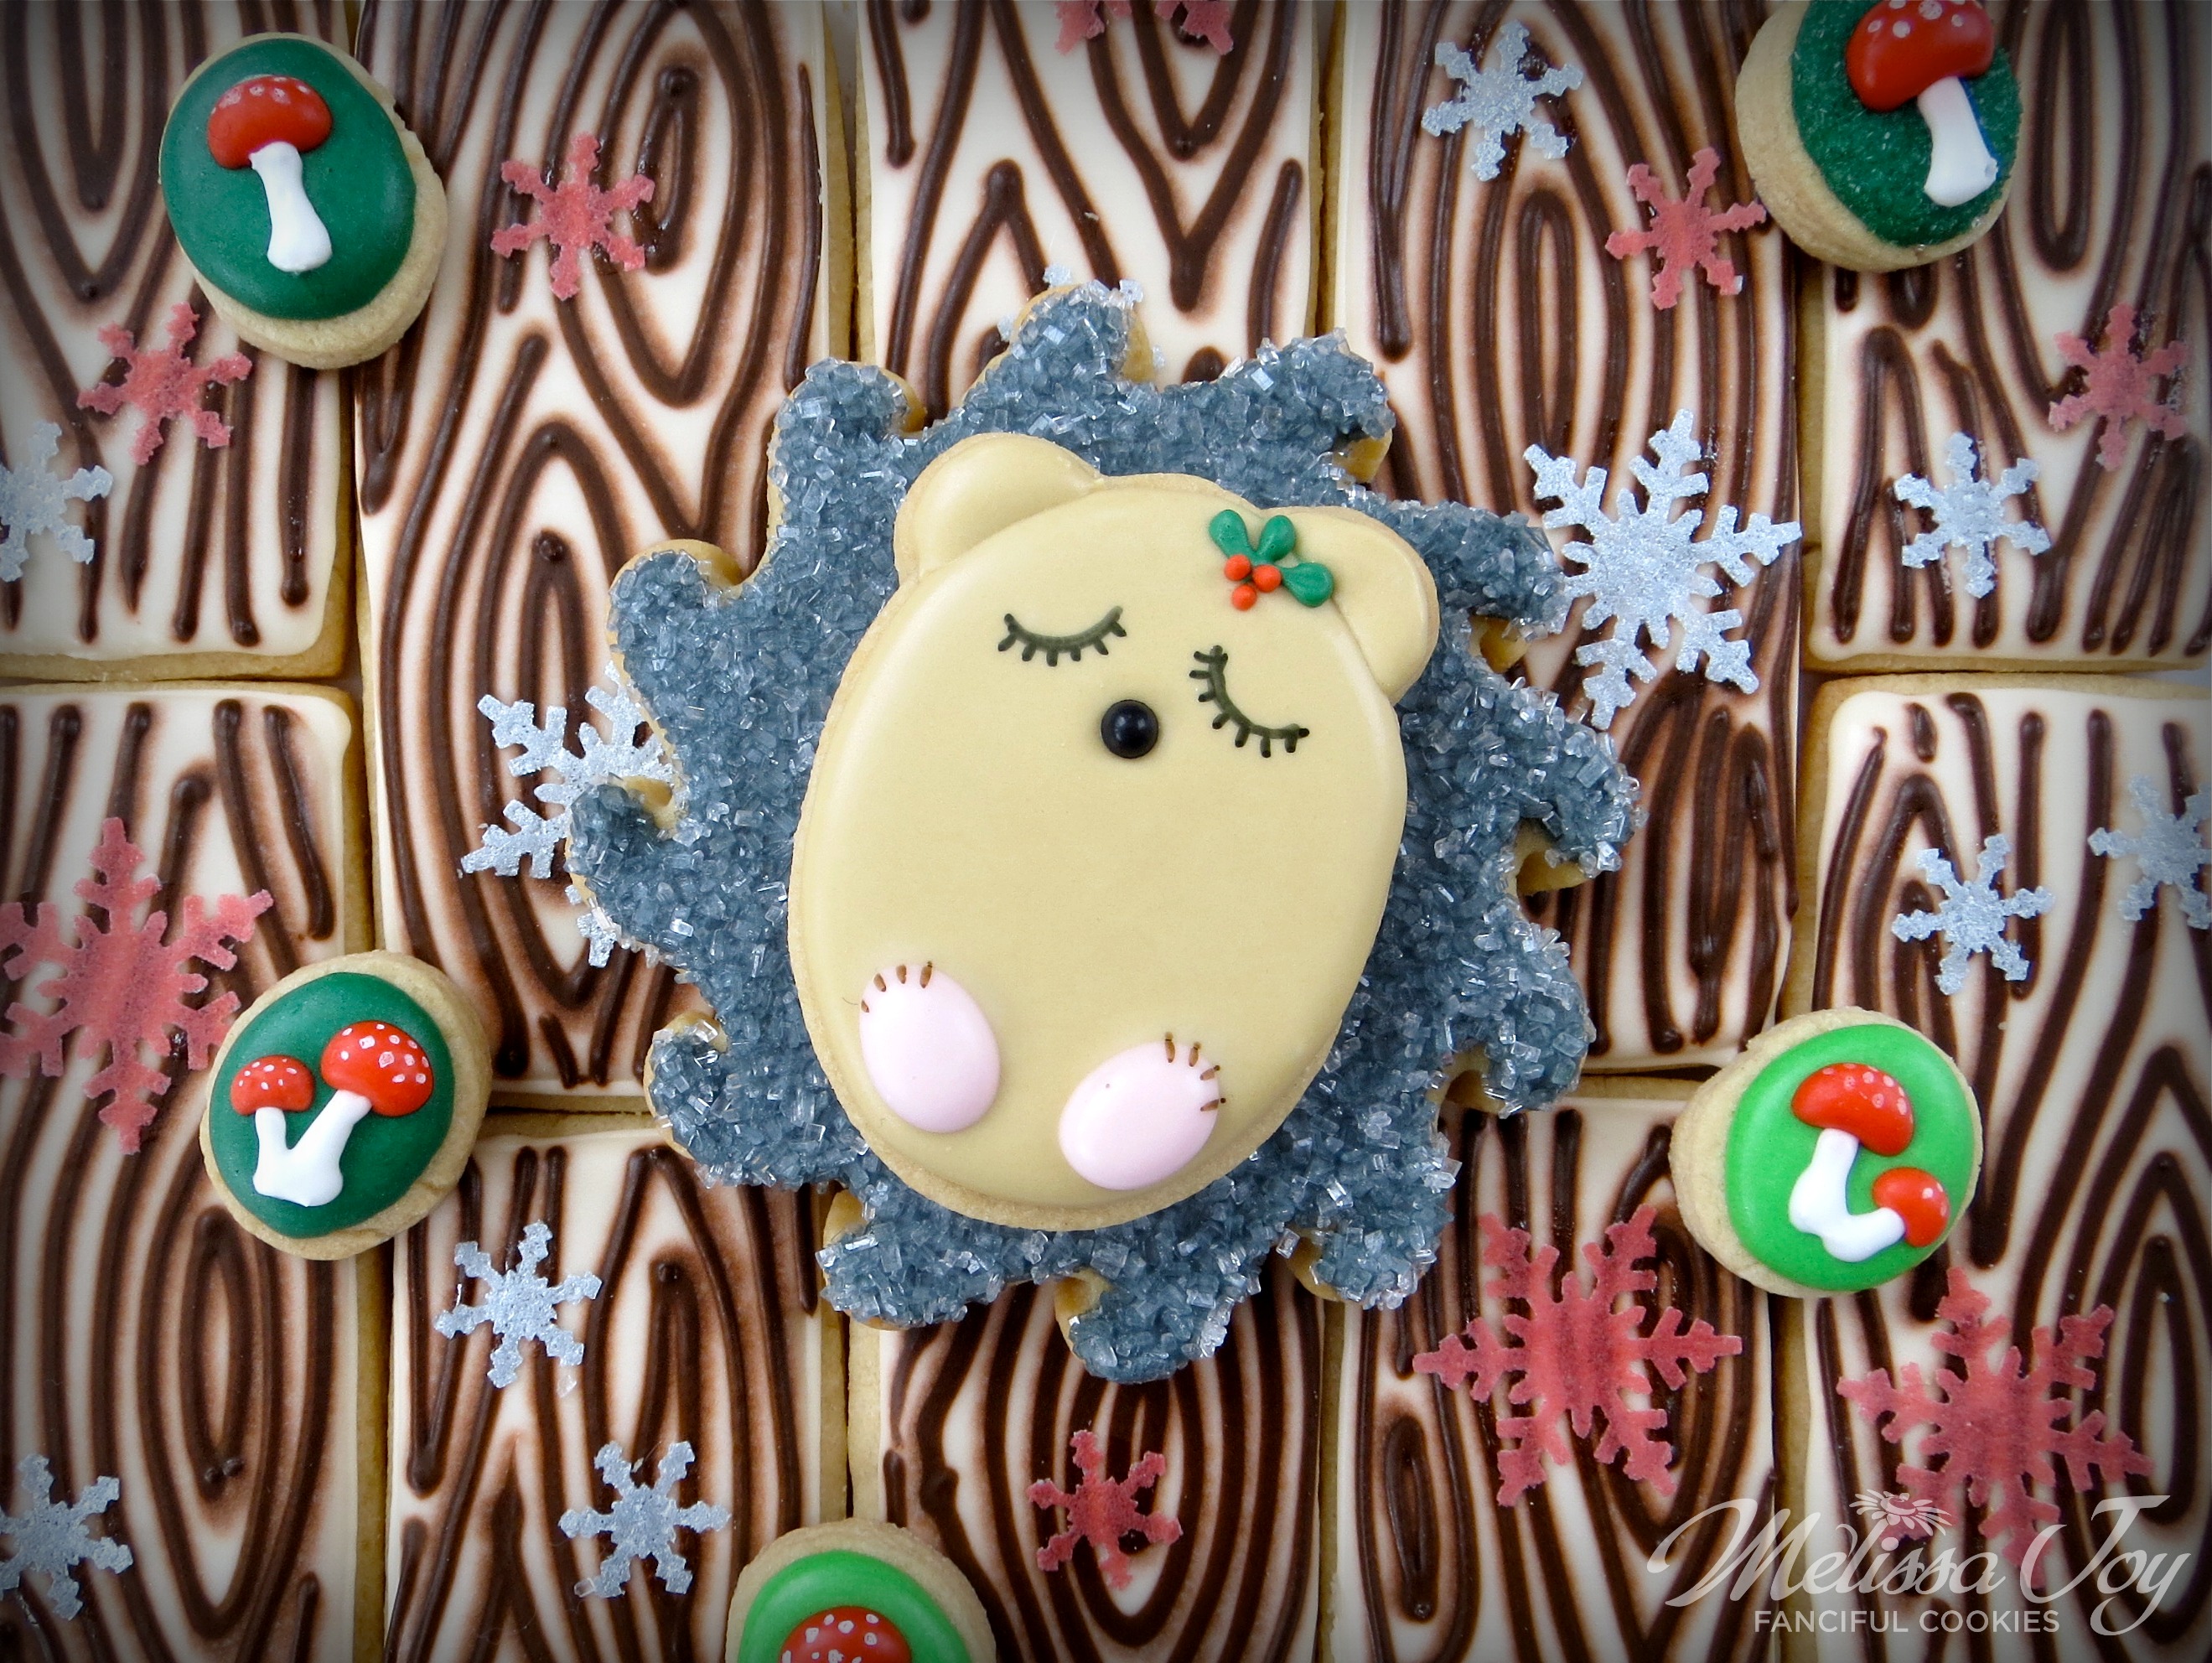
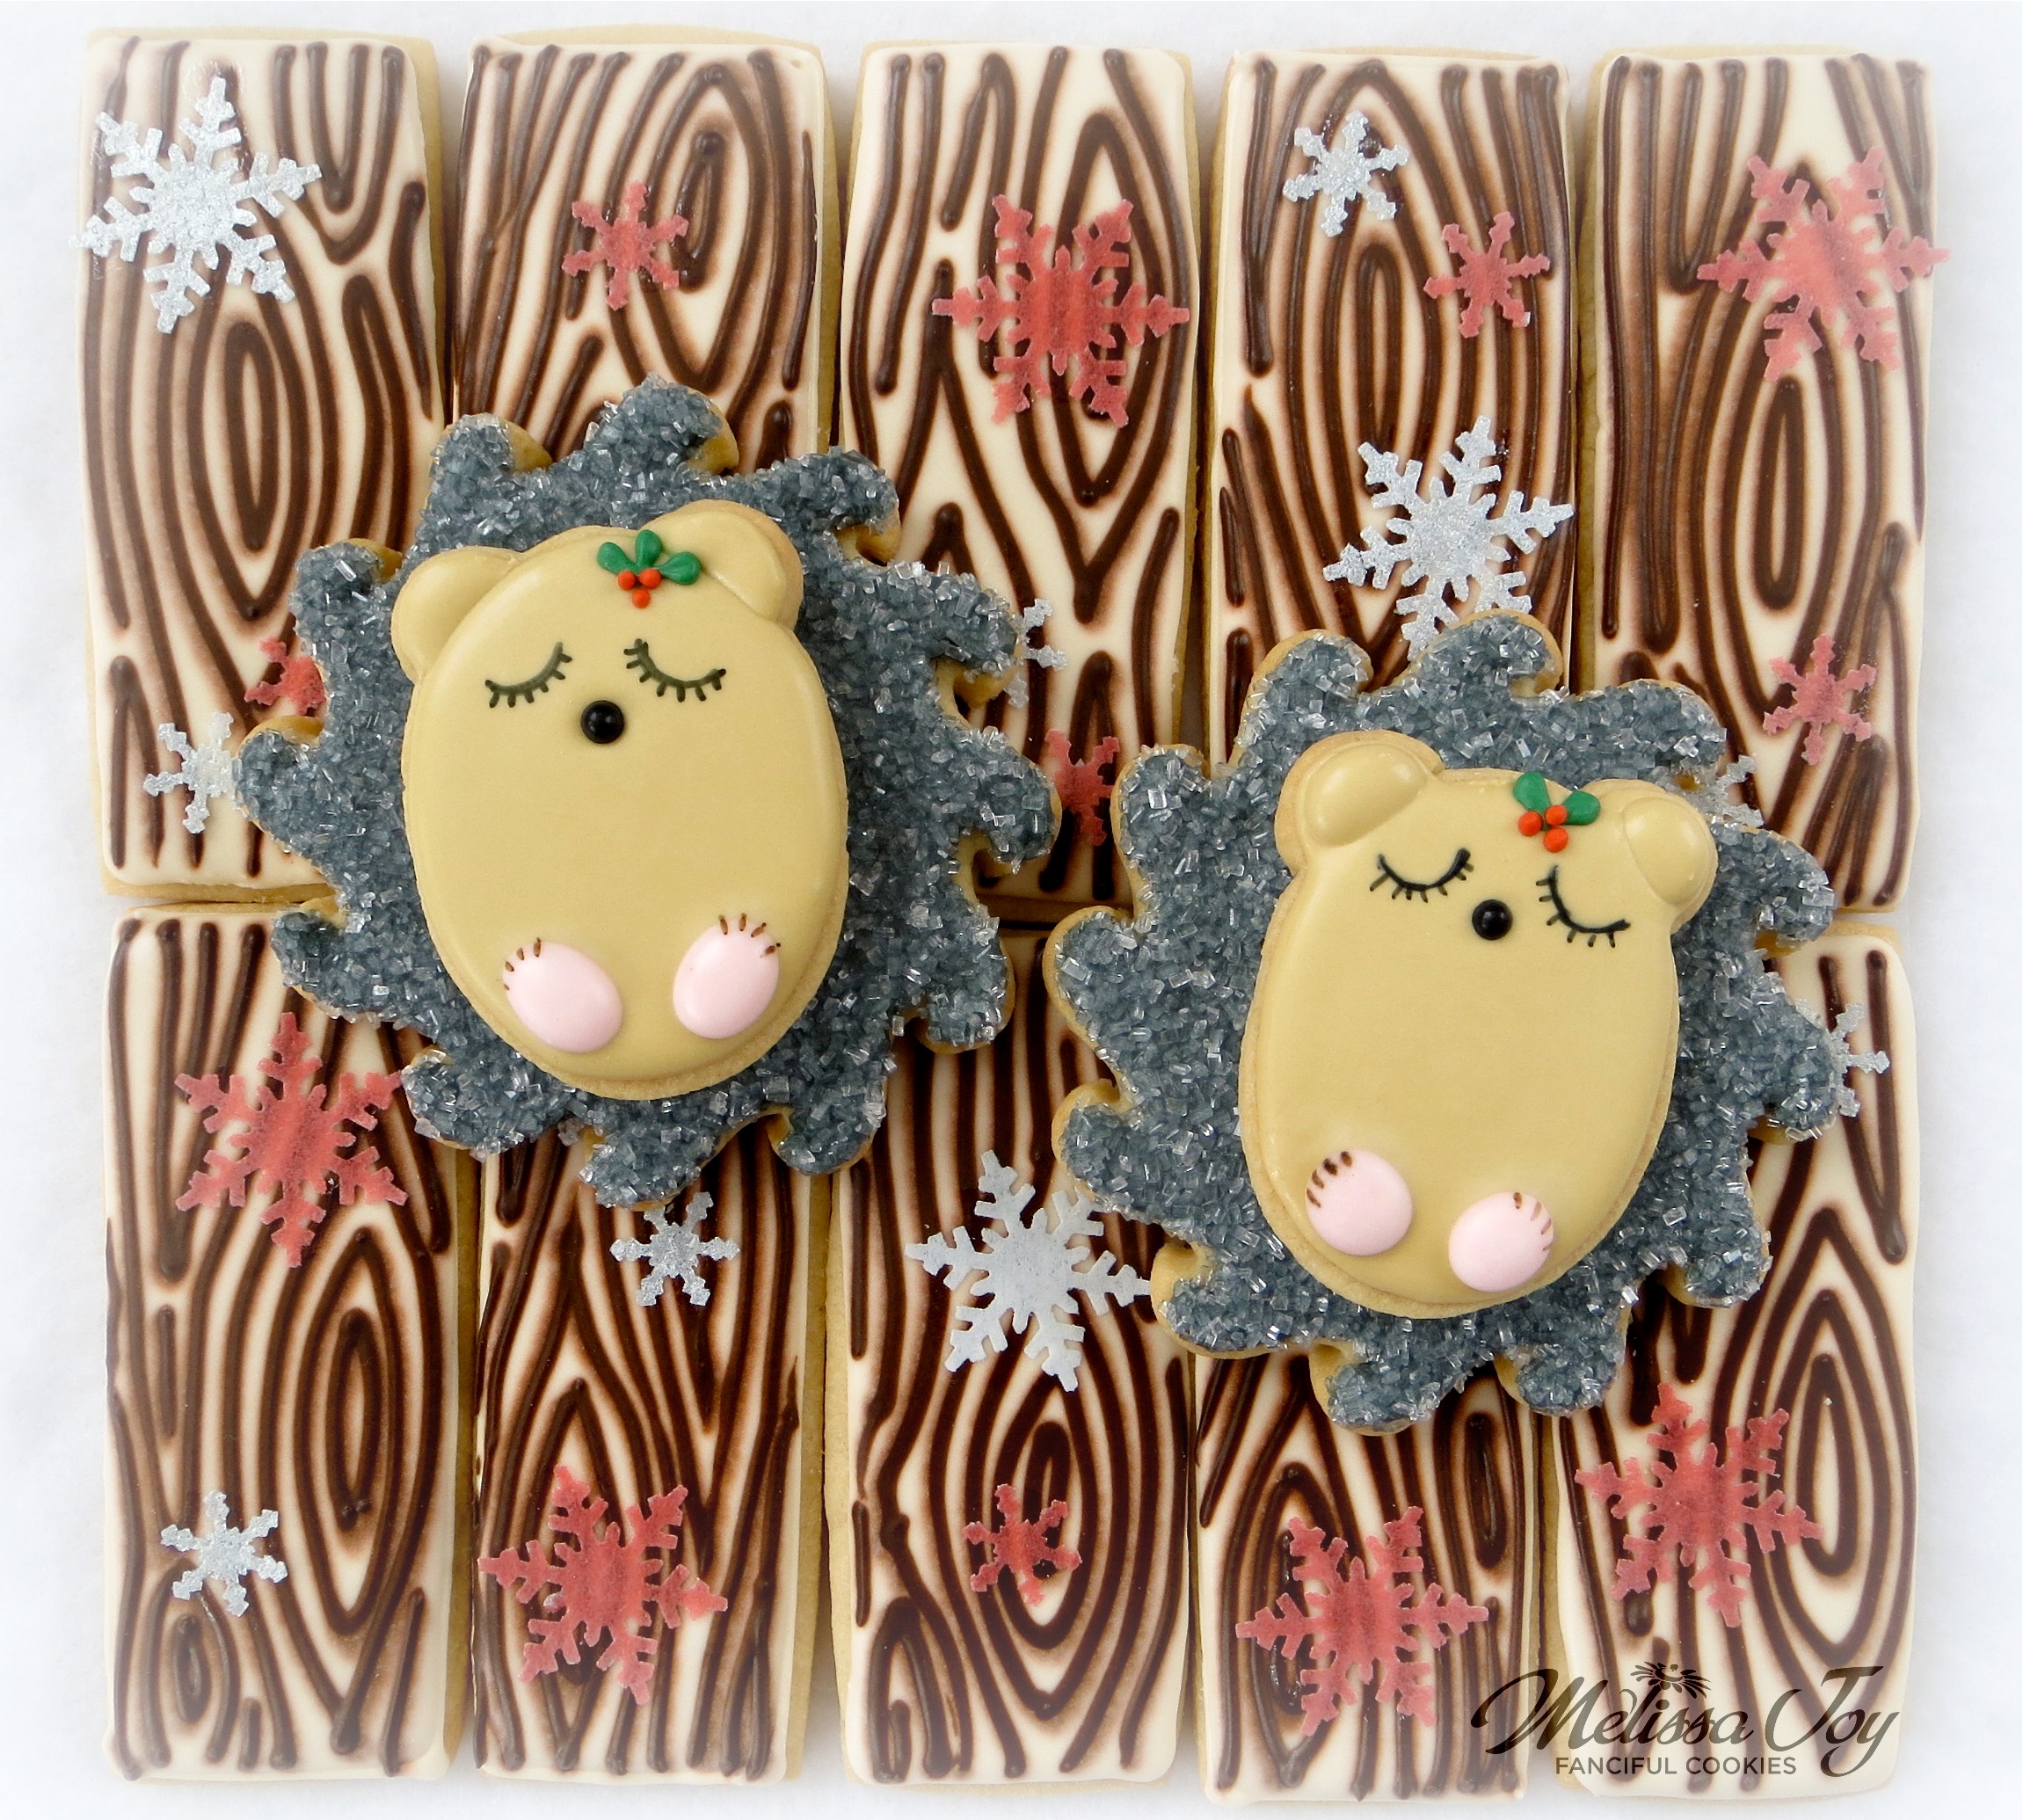
I’ve been immersed in a woodland winter wonderland of ideas just waiting to be created! The reason being that dear Hani, of Haniela’s, had asked me to be a part of a woodland Christmas collaboration, of which I enthusiastically said YES. The result on my end was this little holiday hedgehog, settling down for a long winter’s nap. 
The origins of this gal came from the work of Naturalmente and the felt Winter Berry Hedgehog she crafted that I found on Pinterest (her Etsy shop has super adorable pieces!). I asked permission to cookie her hedgie and she sweetly agreed, then I sent the finished product to her in Hungary as token of my appreciation!
If you opt for an edible version of this holiday hedgehog, the steps are rather simple.
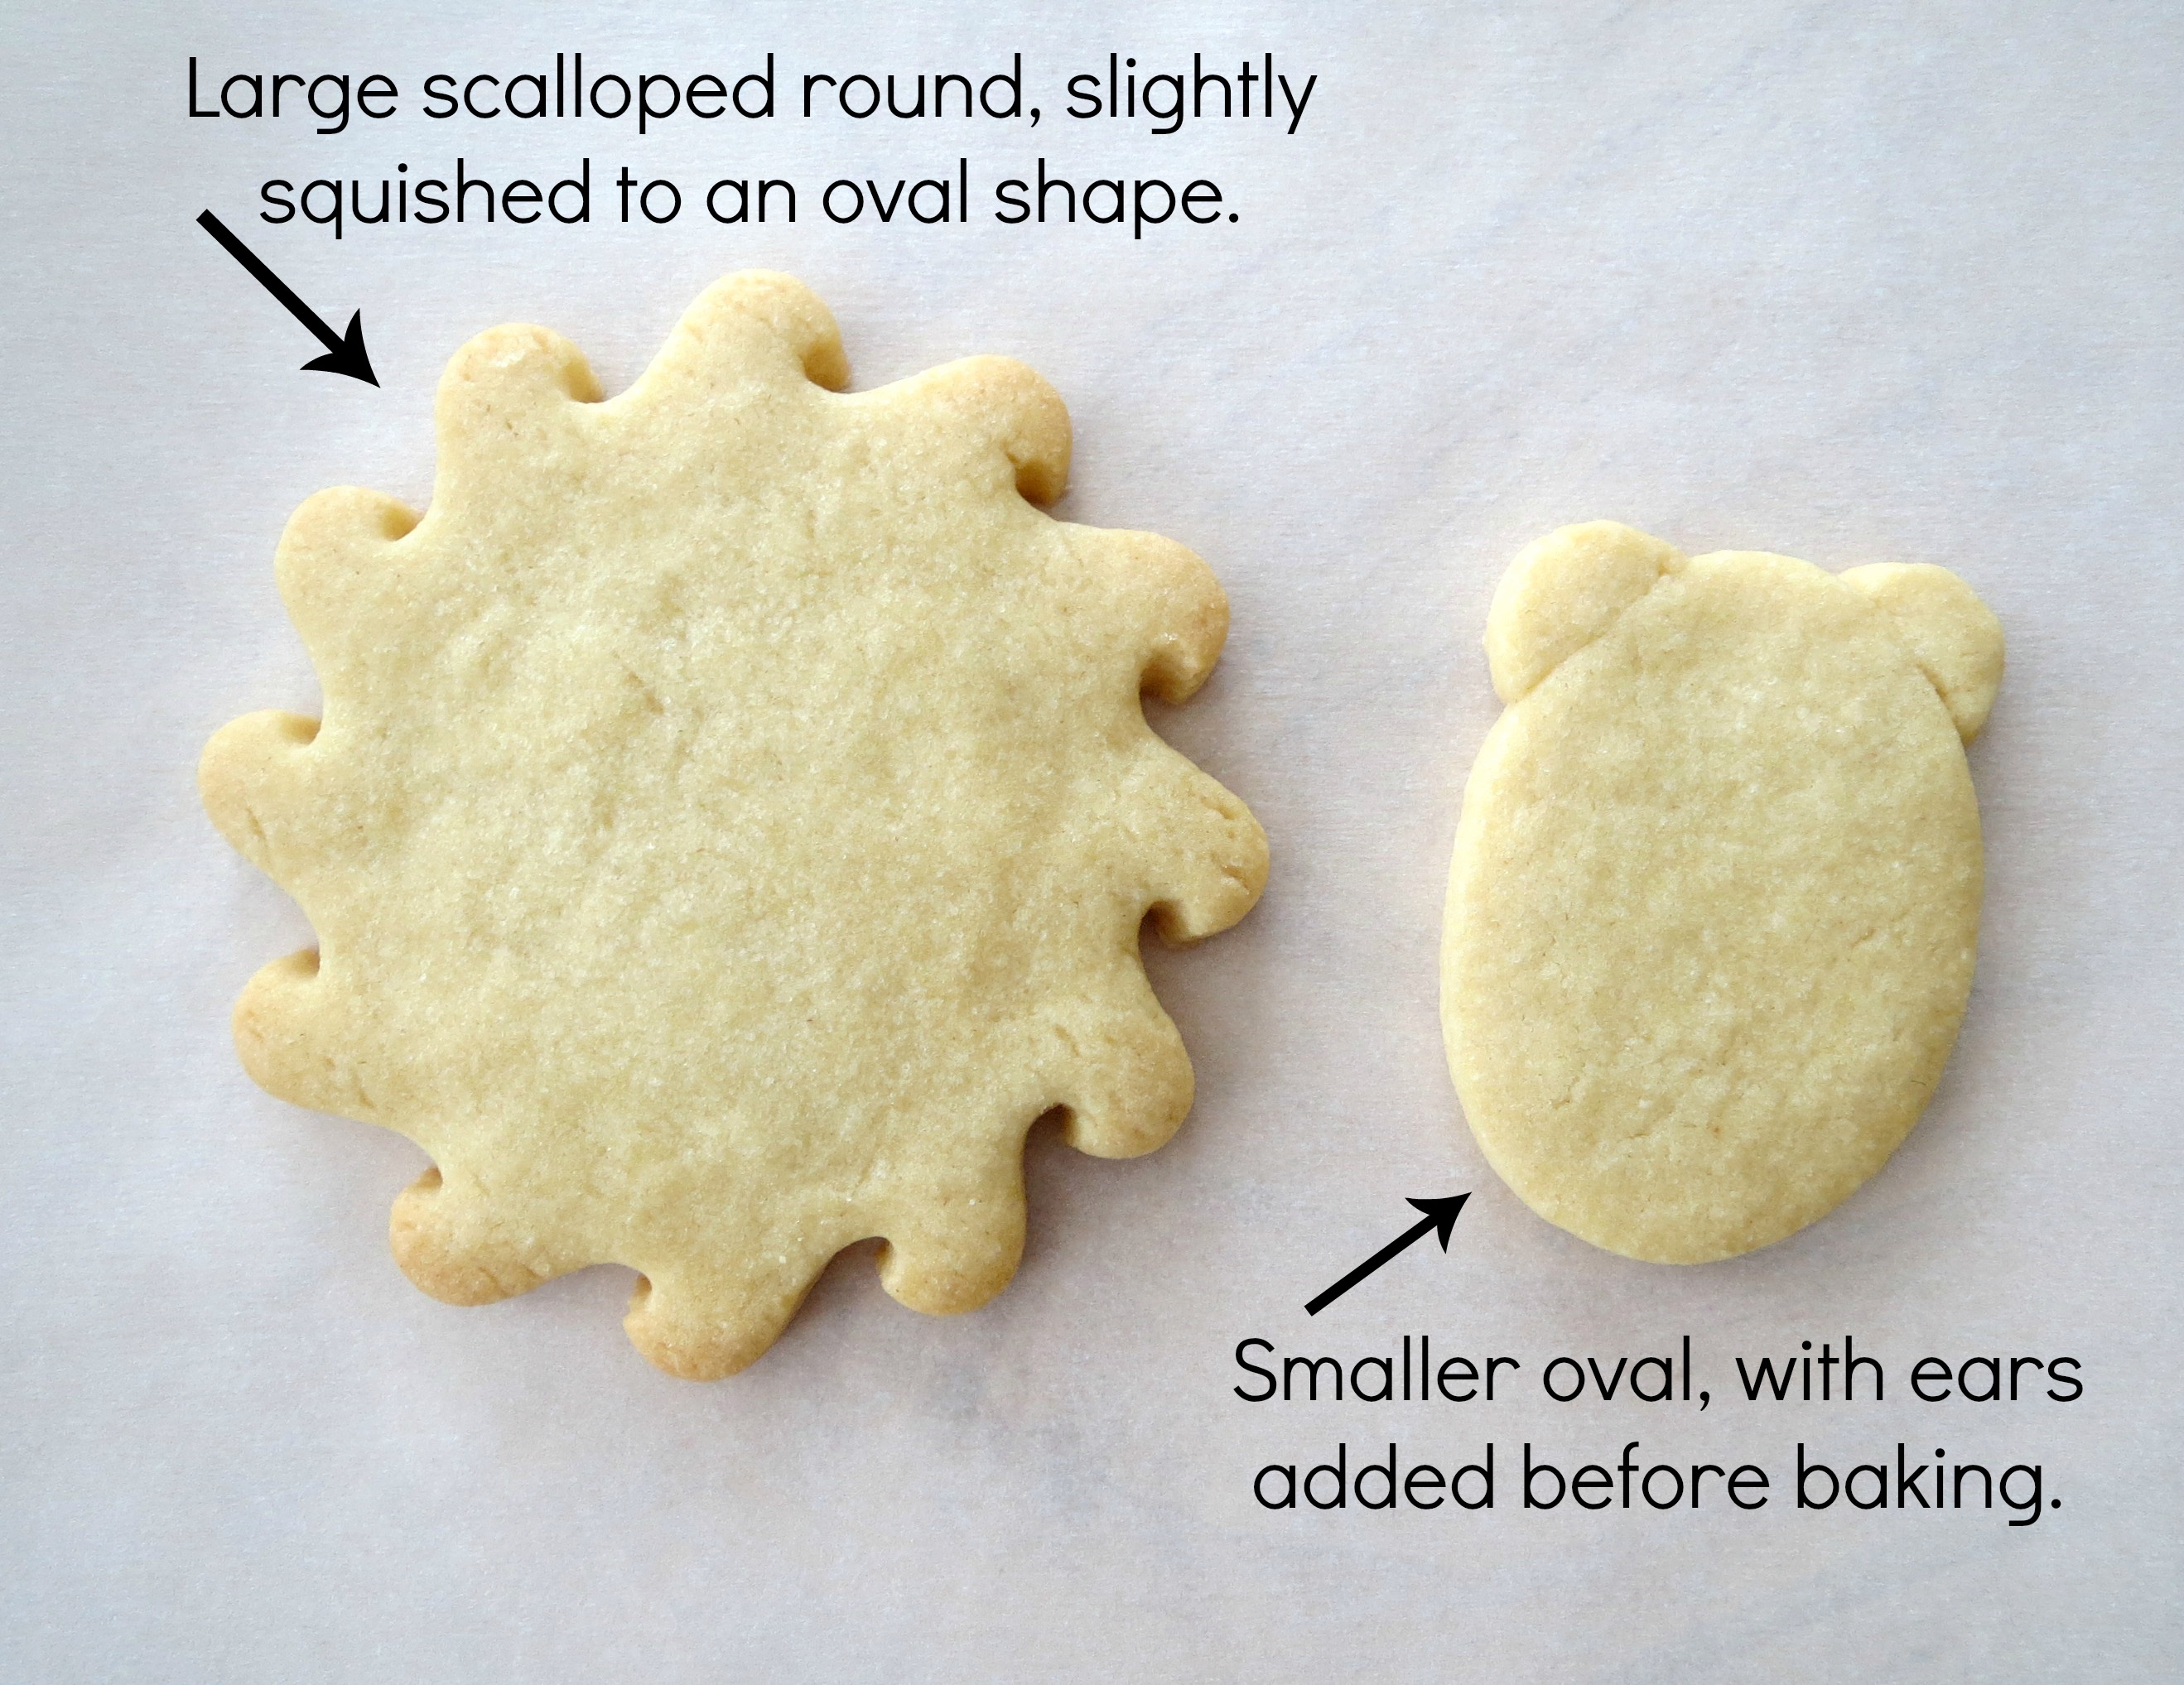
I had the perfect shaped cookie cutter for my hedgehog’s spines (you can find it here), but you could use a scalloped round or sunflower cutter just as well.

I love coarse sugar this season! It’s chunkier than sanding sugar, gives off a super sparkle and has a great crunch. I thought it gave a great textured look to the cookie base.
For the body, ice the oval first and let set a bit before doing the ears, so the stay segmented. I used CK black sugar pearls for the nose, but you could pipe it with royal icing as well. The pearls were one less color of icing to mix, which is always a win in my book!
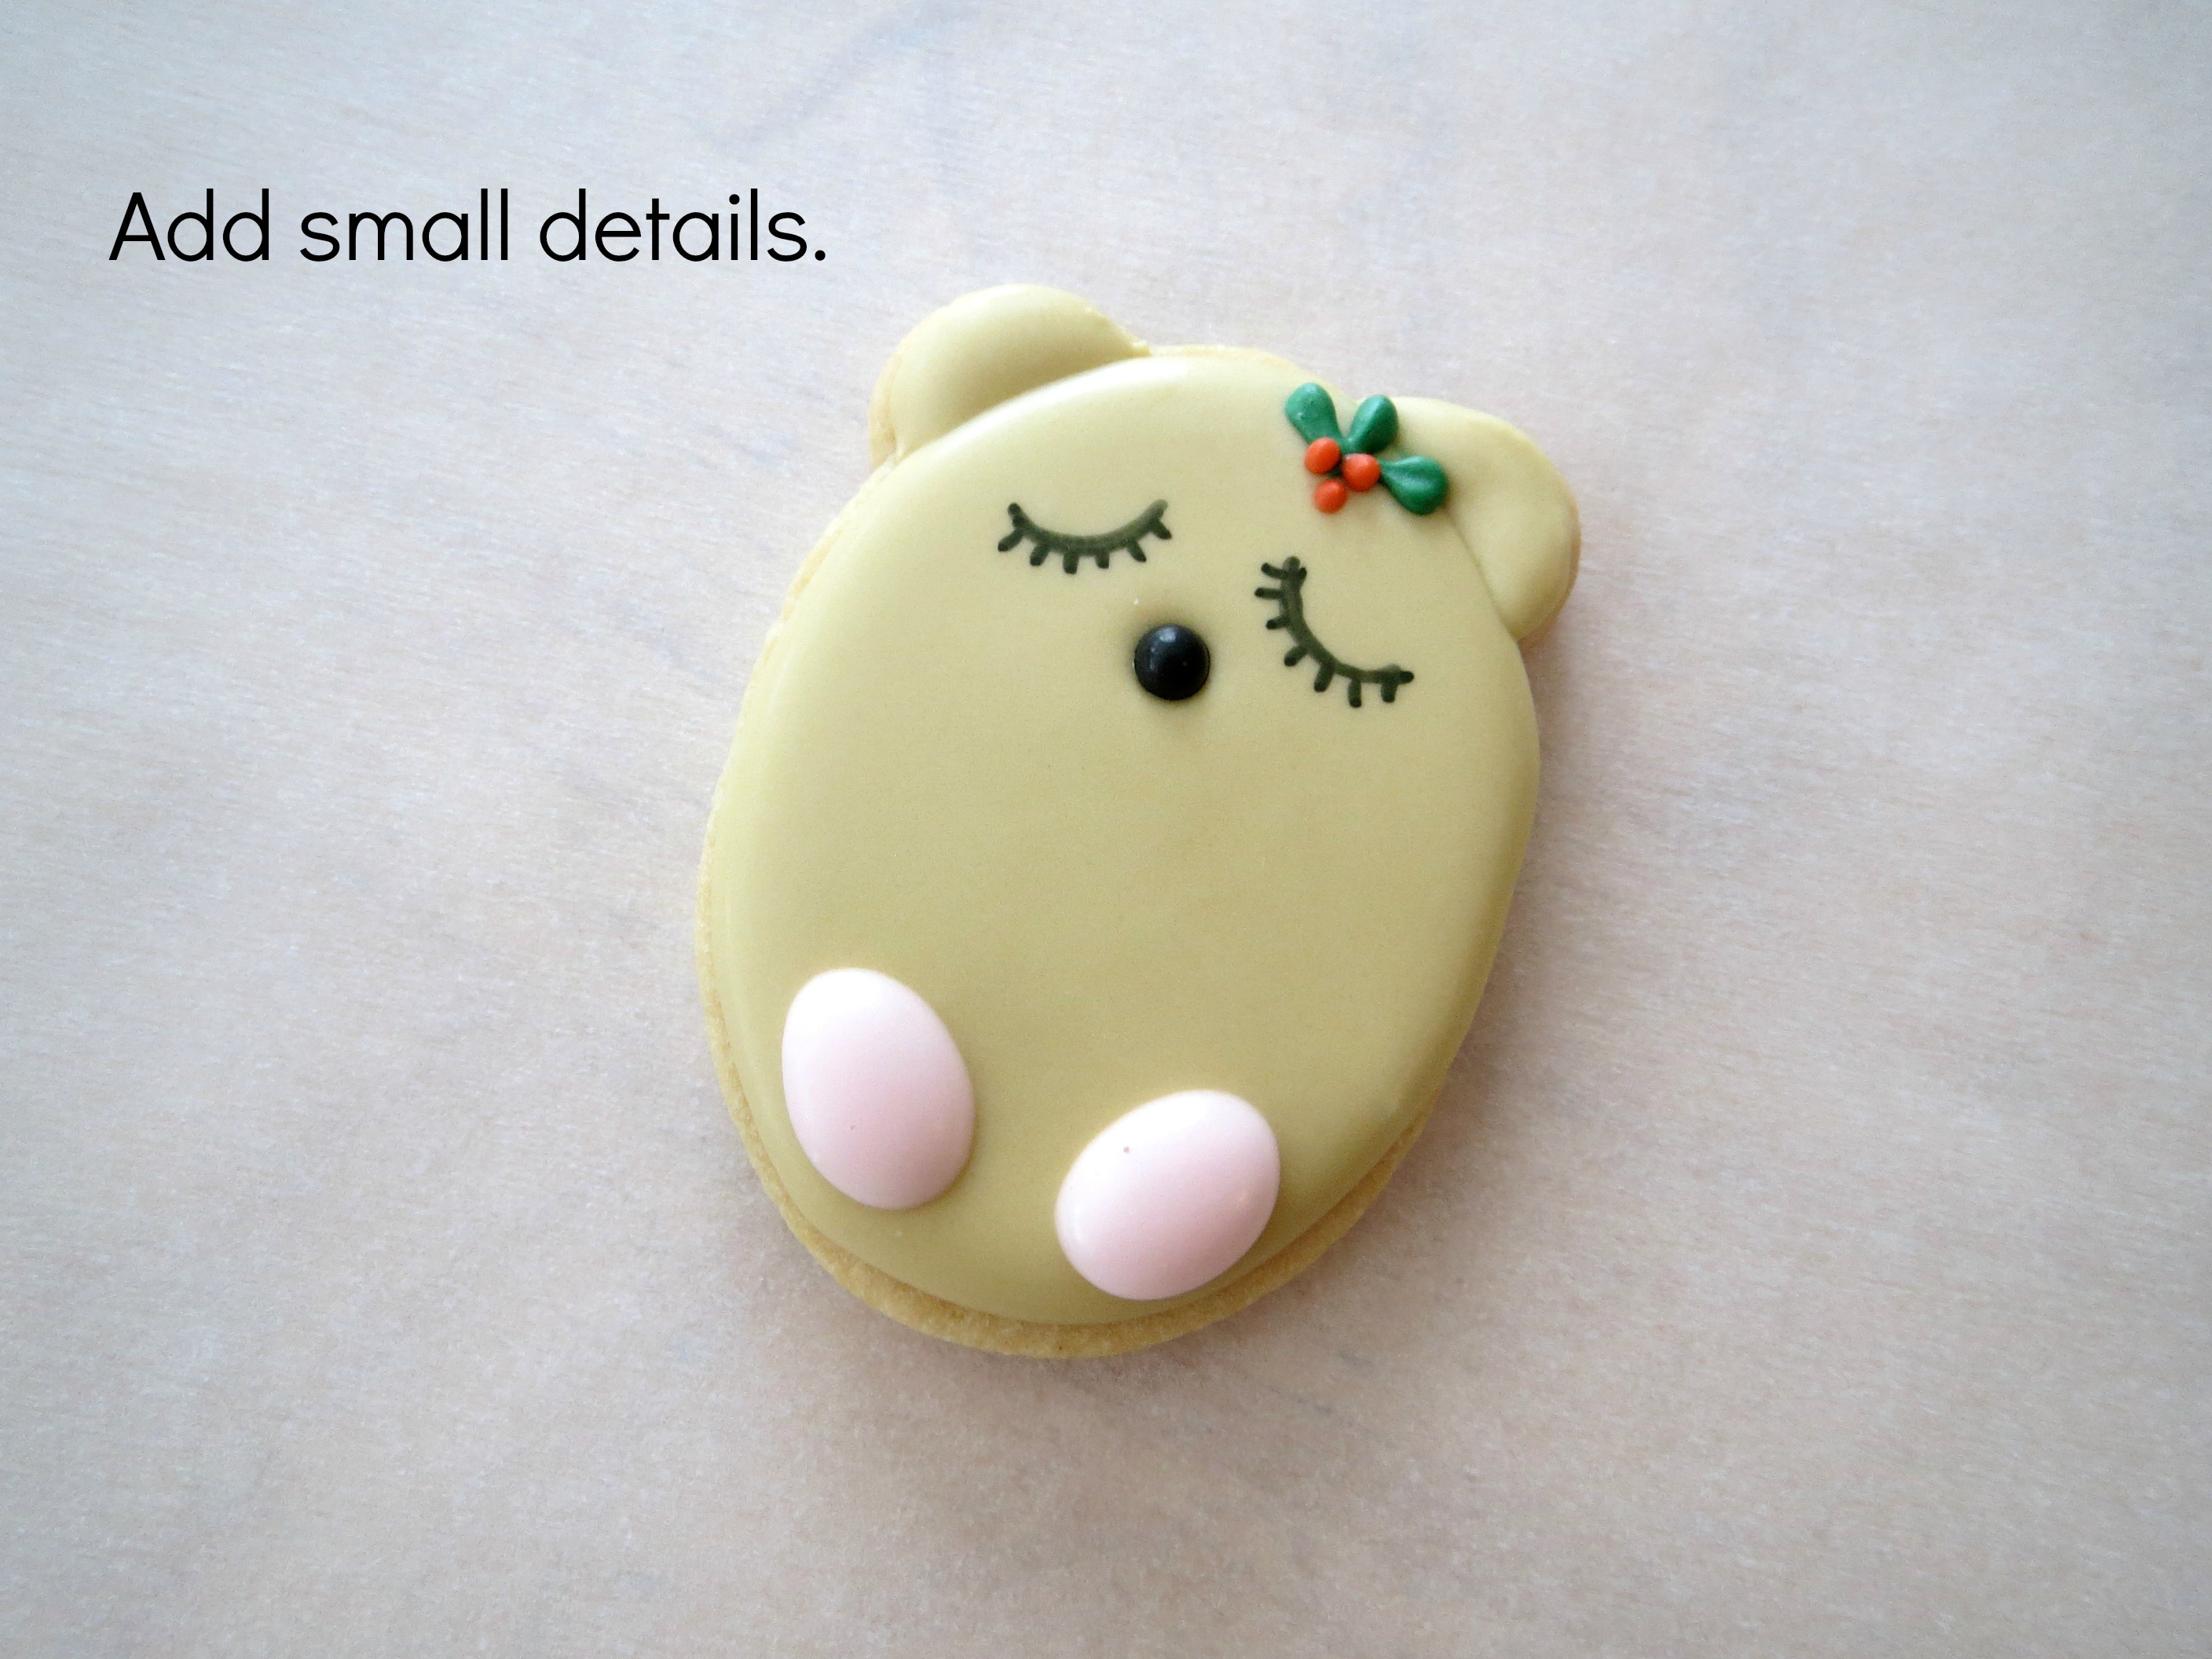
I made sleepy eyes with my food writer and used icing for the feet and holly berries. Once the feet set up, you can add a small toe detail. After the two cookies dry, adhere them together with a squirt of icing.
And with that, your holiday hedgehog is ready!
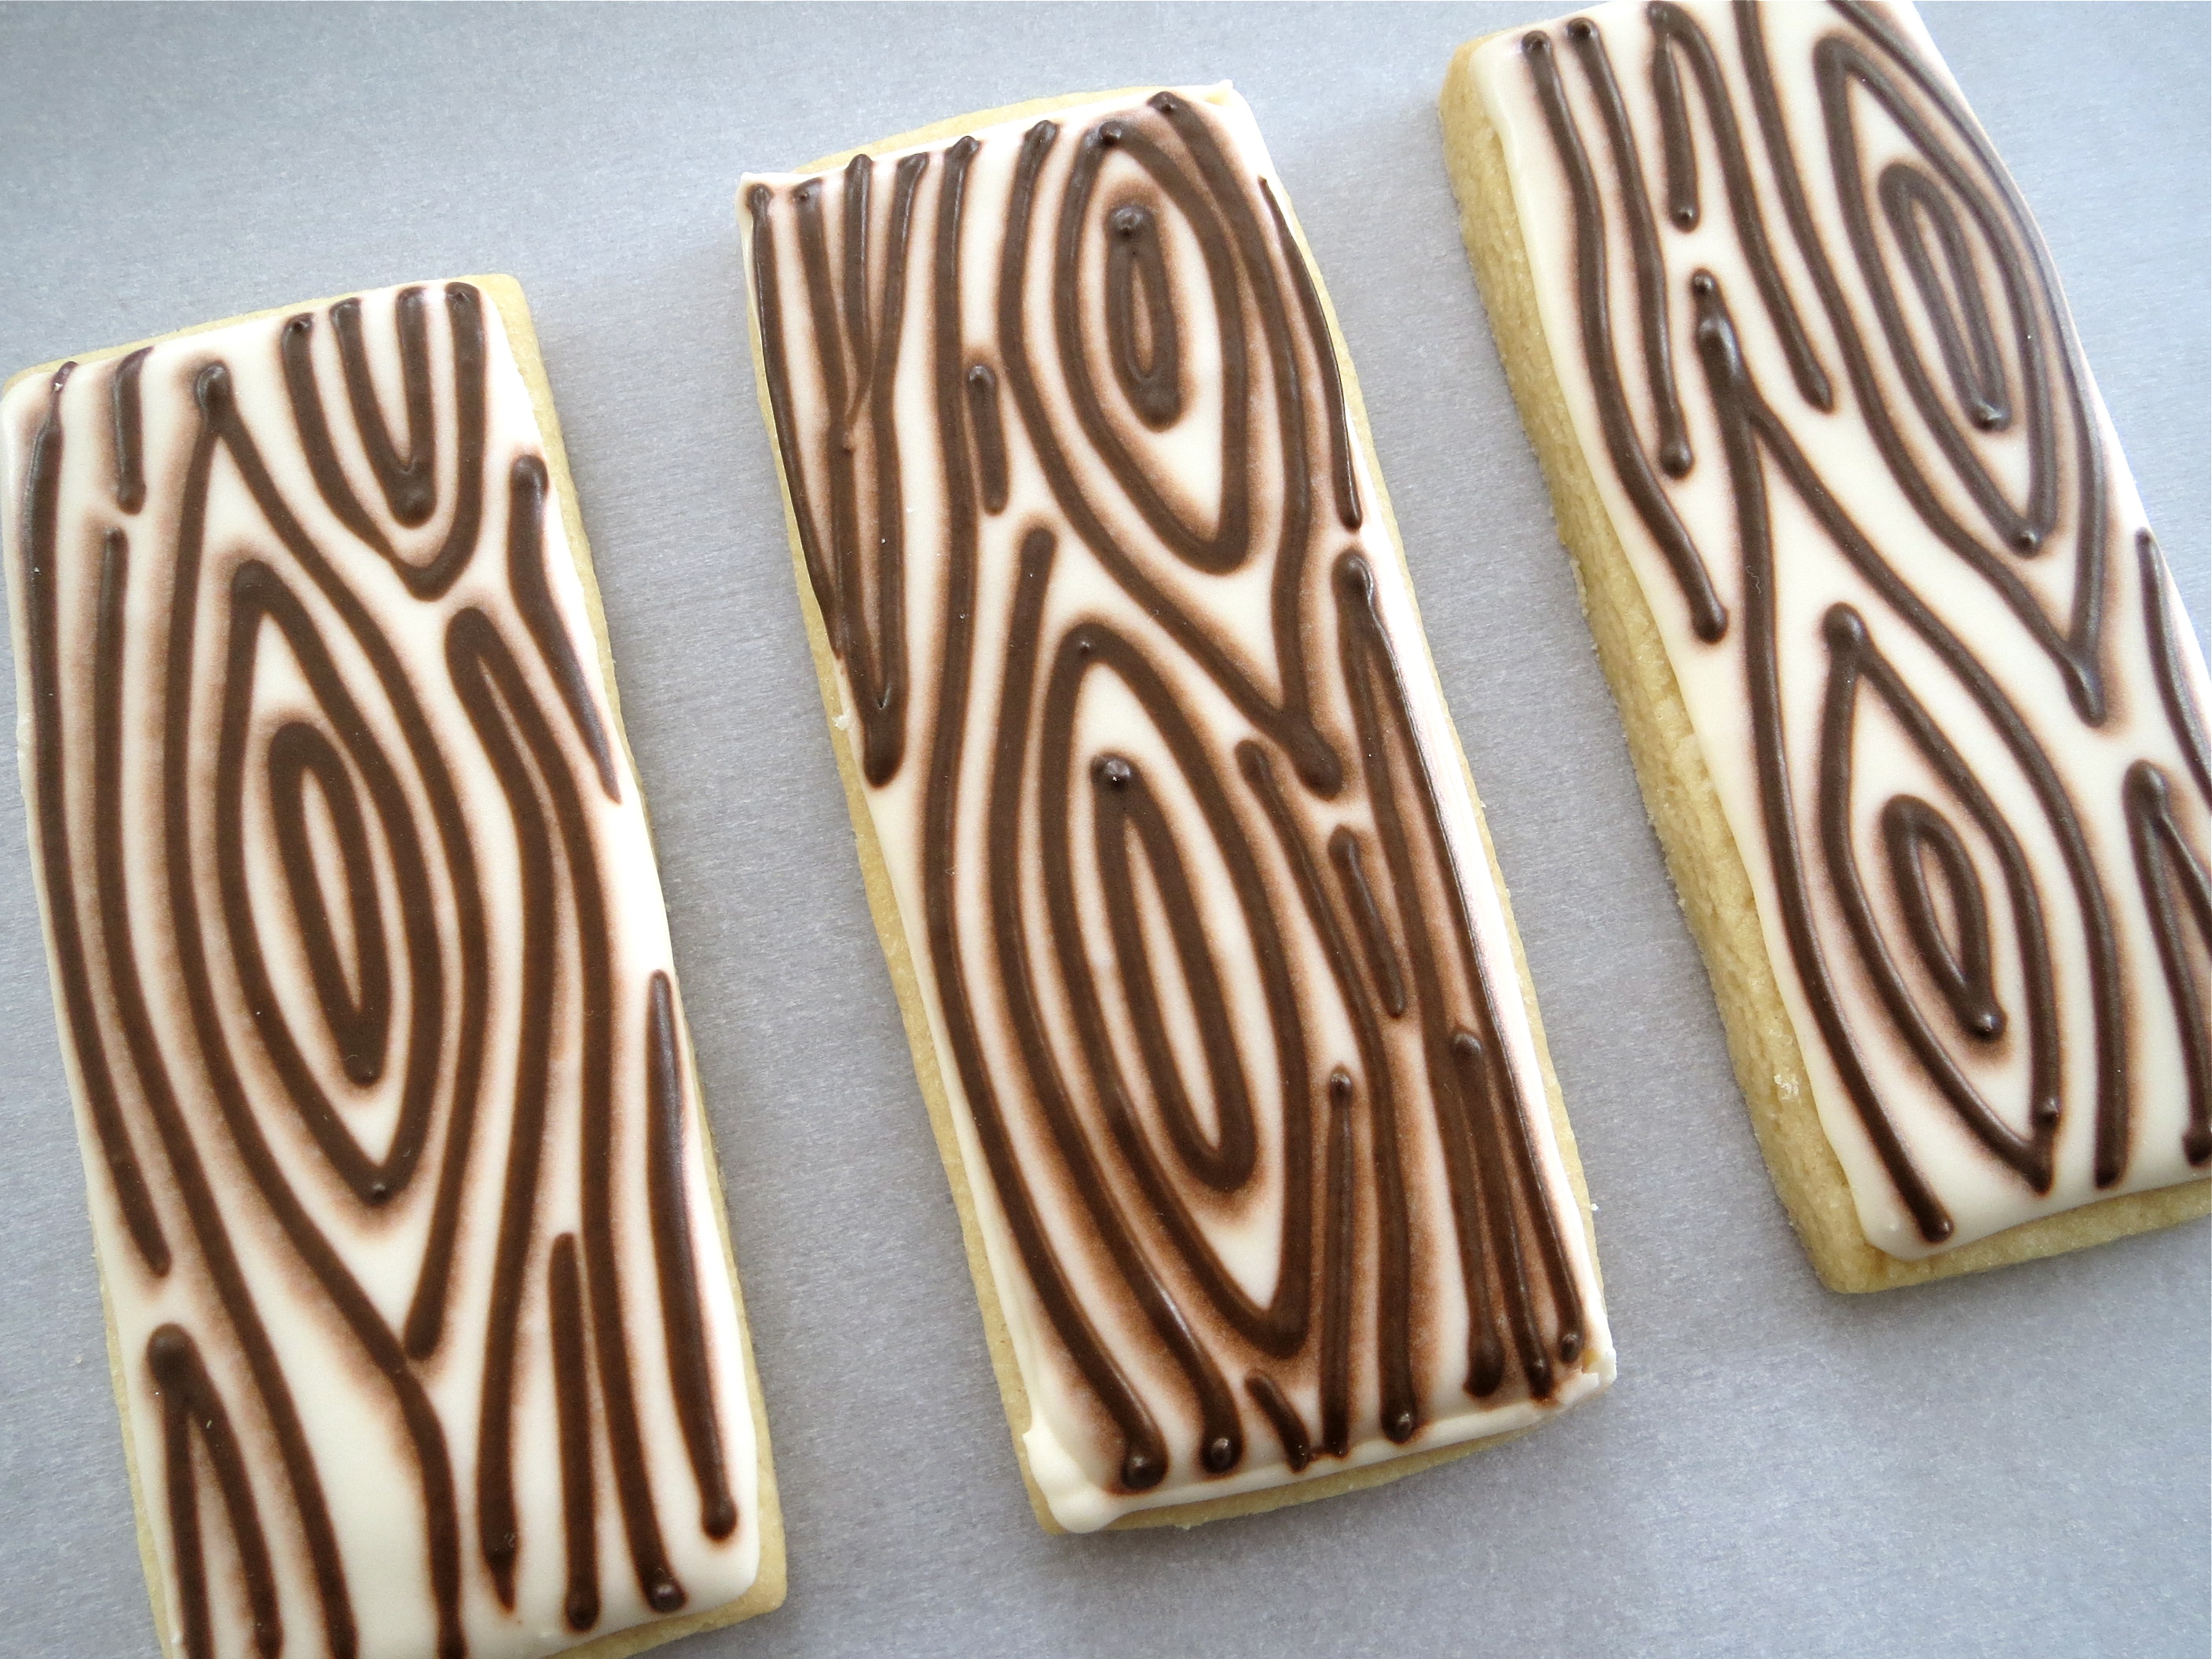

While the hedgie is the main event, the background I put them on deserves a bit of mentioning. The long, rectangle cookies were iced with a woodgrain pattern using a wet-on-wet technique. The fun part came by embellishing them with wafer paper snowflakes that I sprayed with food color mist and cut out with a paper punch. A fabulous tutorial by my friend Yankee Girl Yummies about working with wafer paper can be read here. She’s a wealth of information and talent!
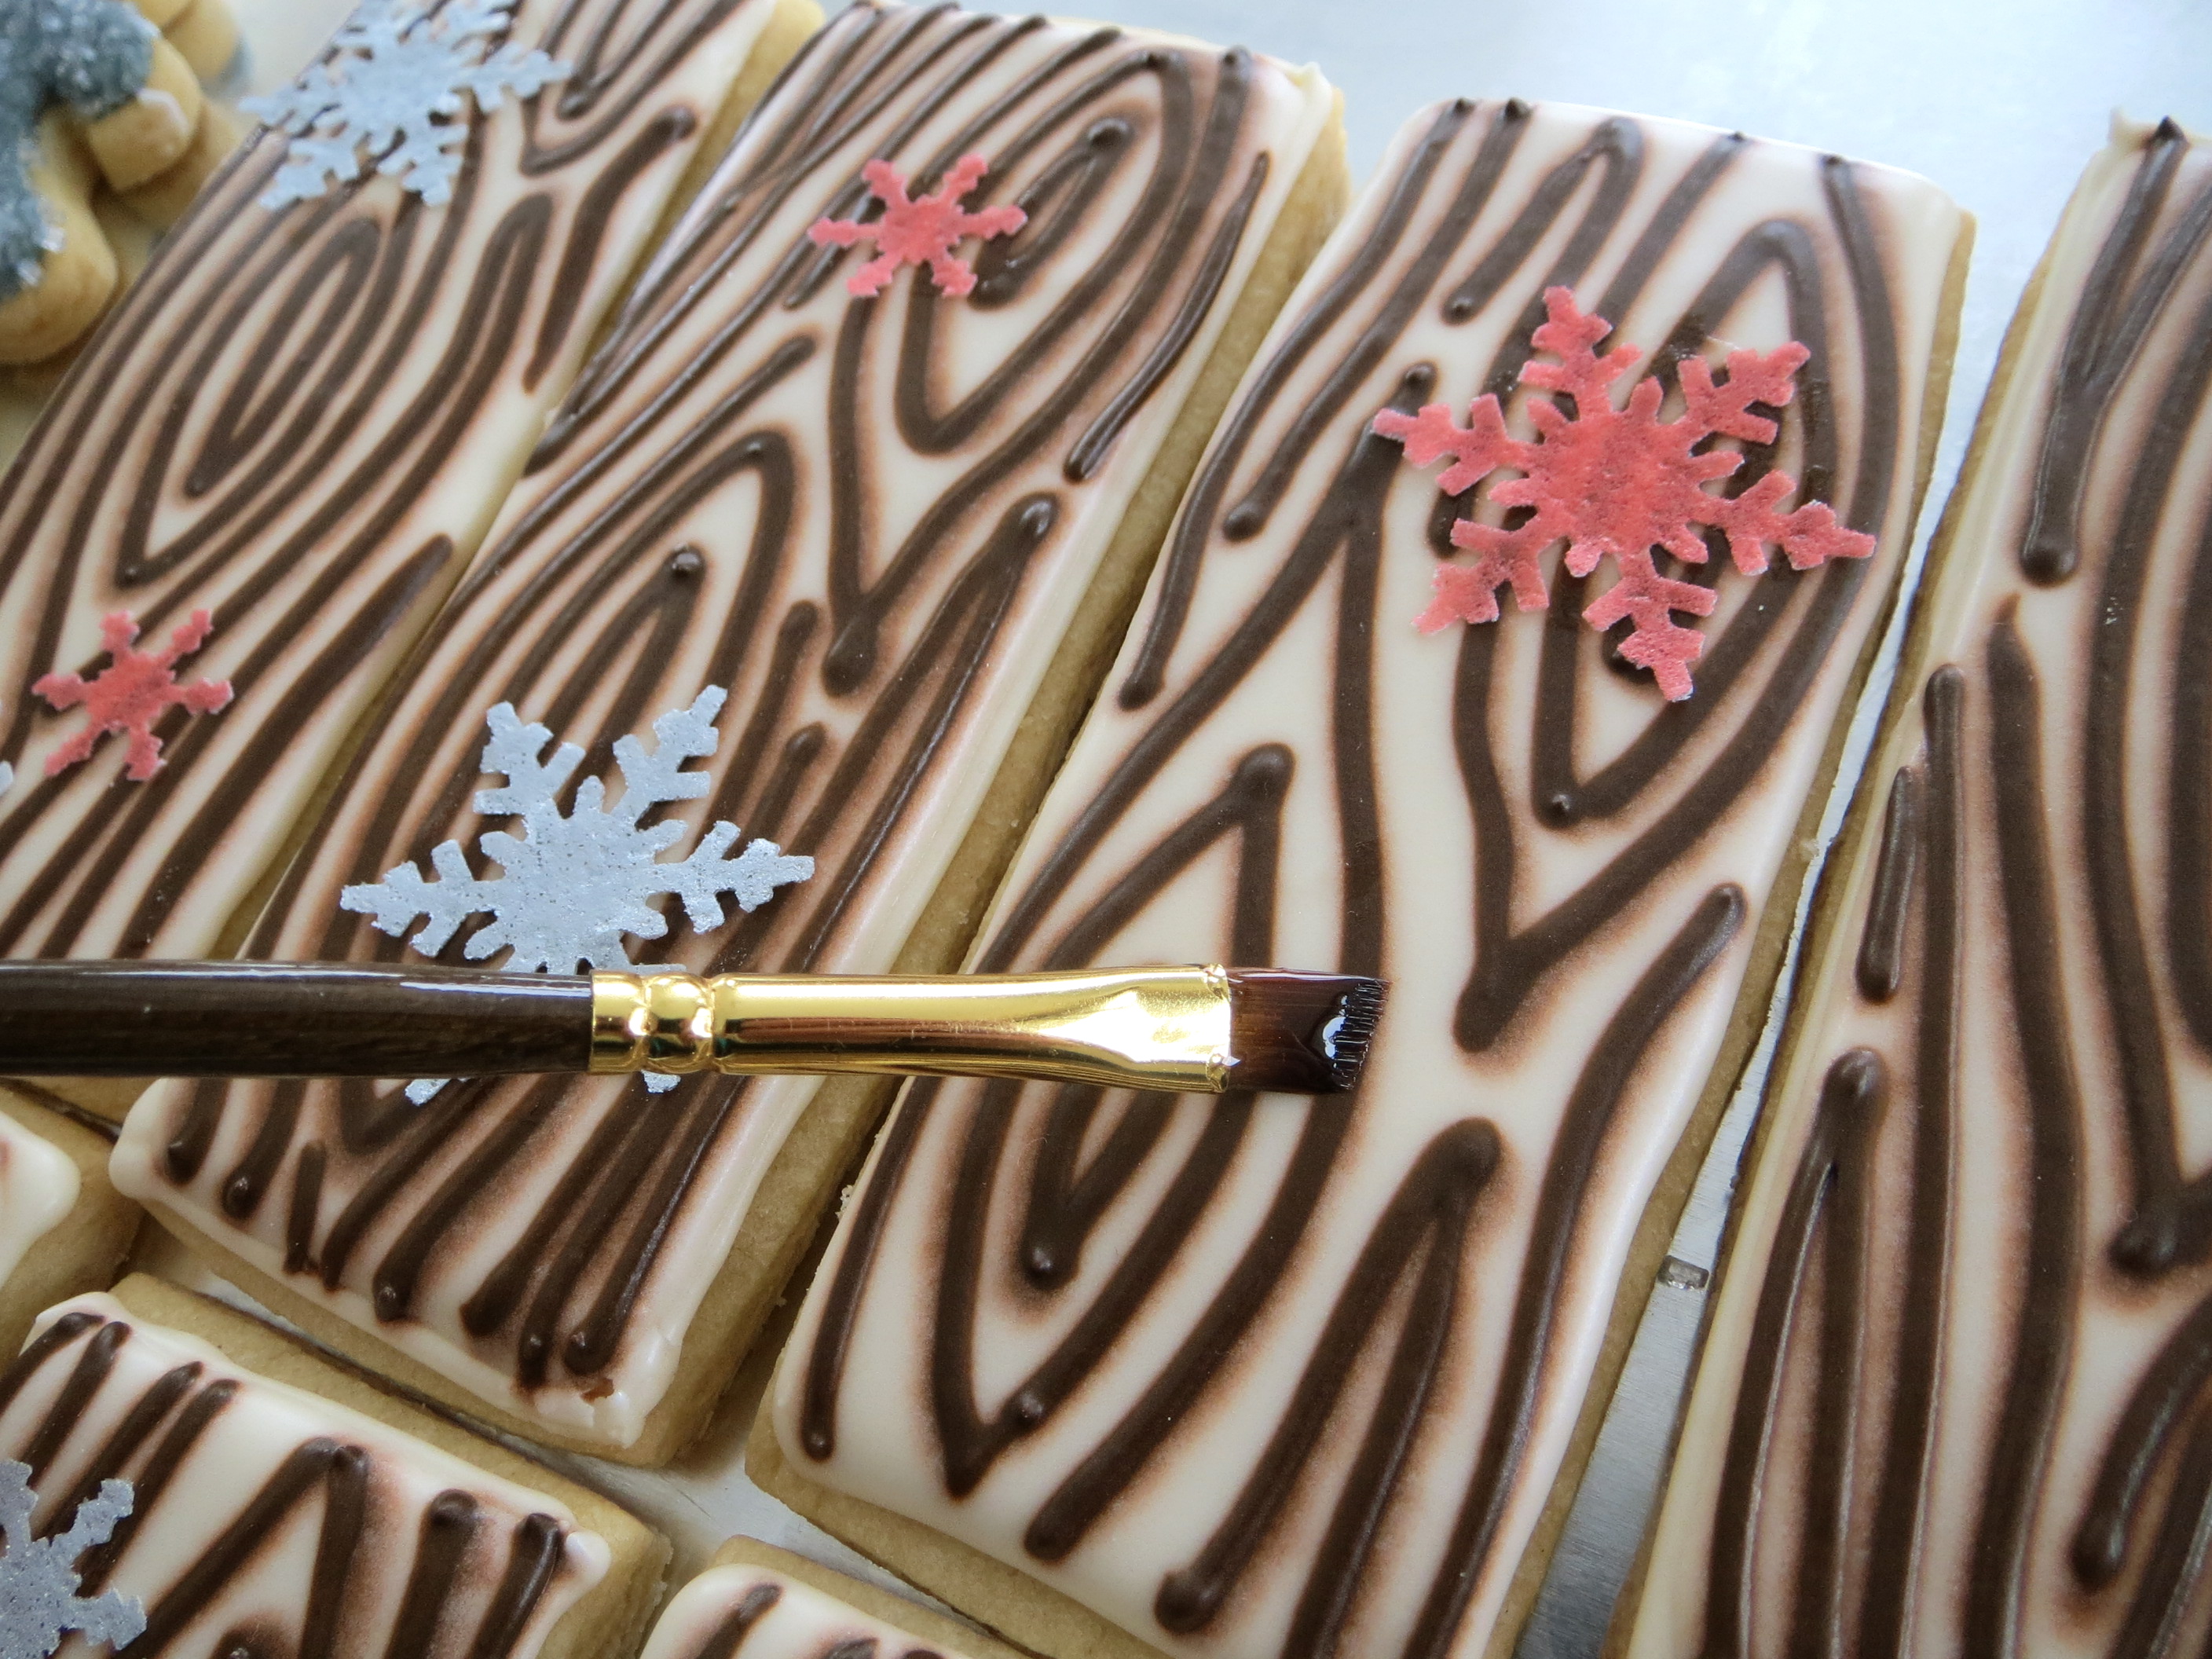
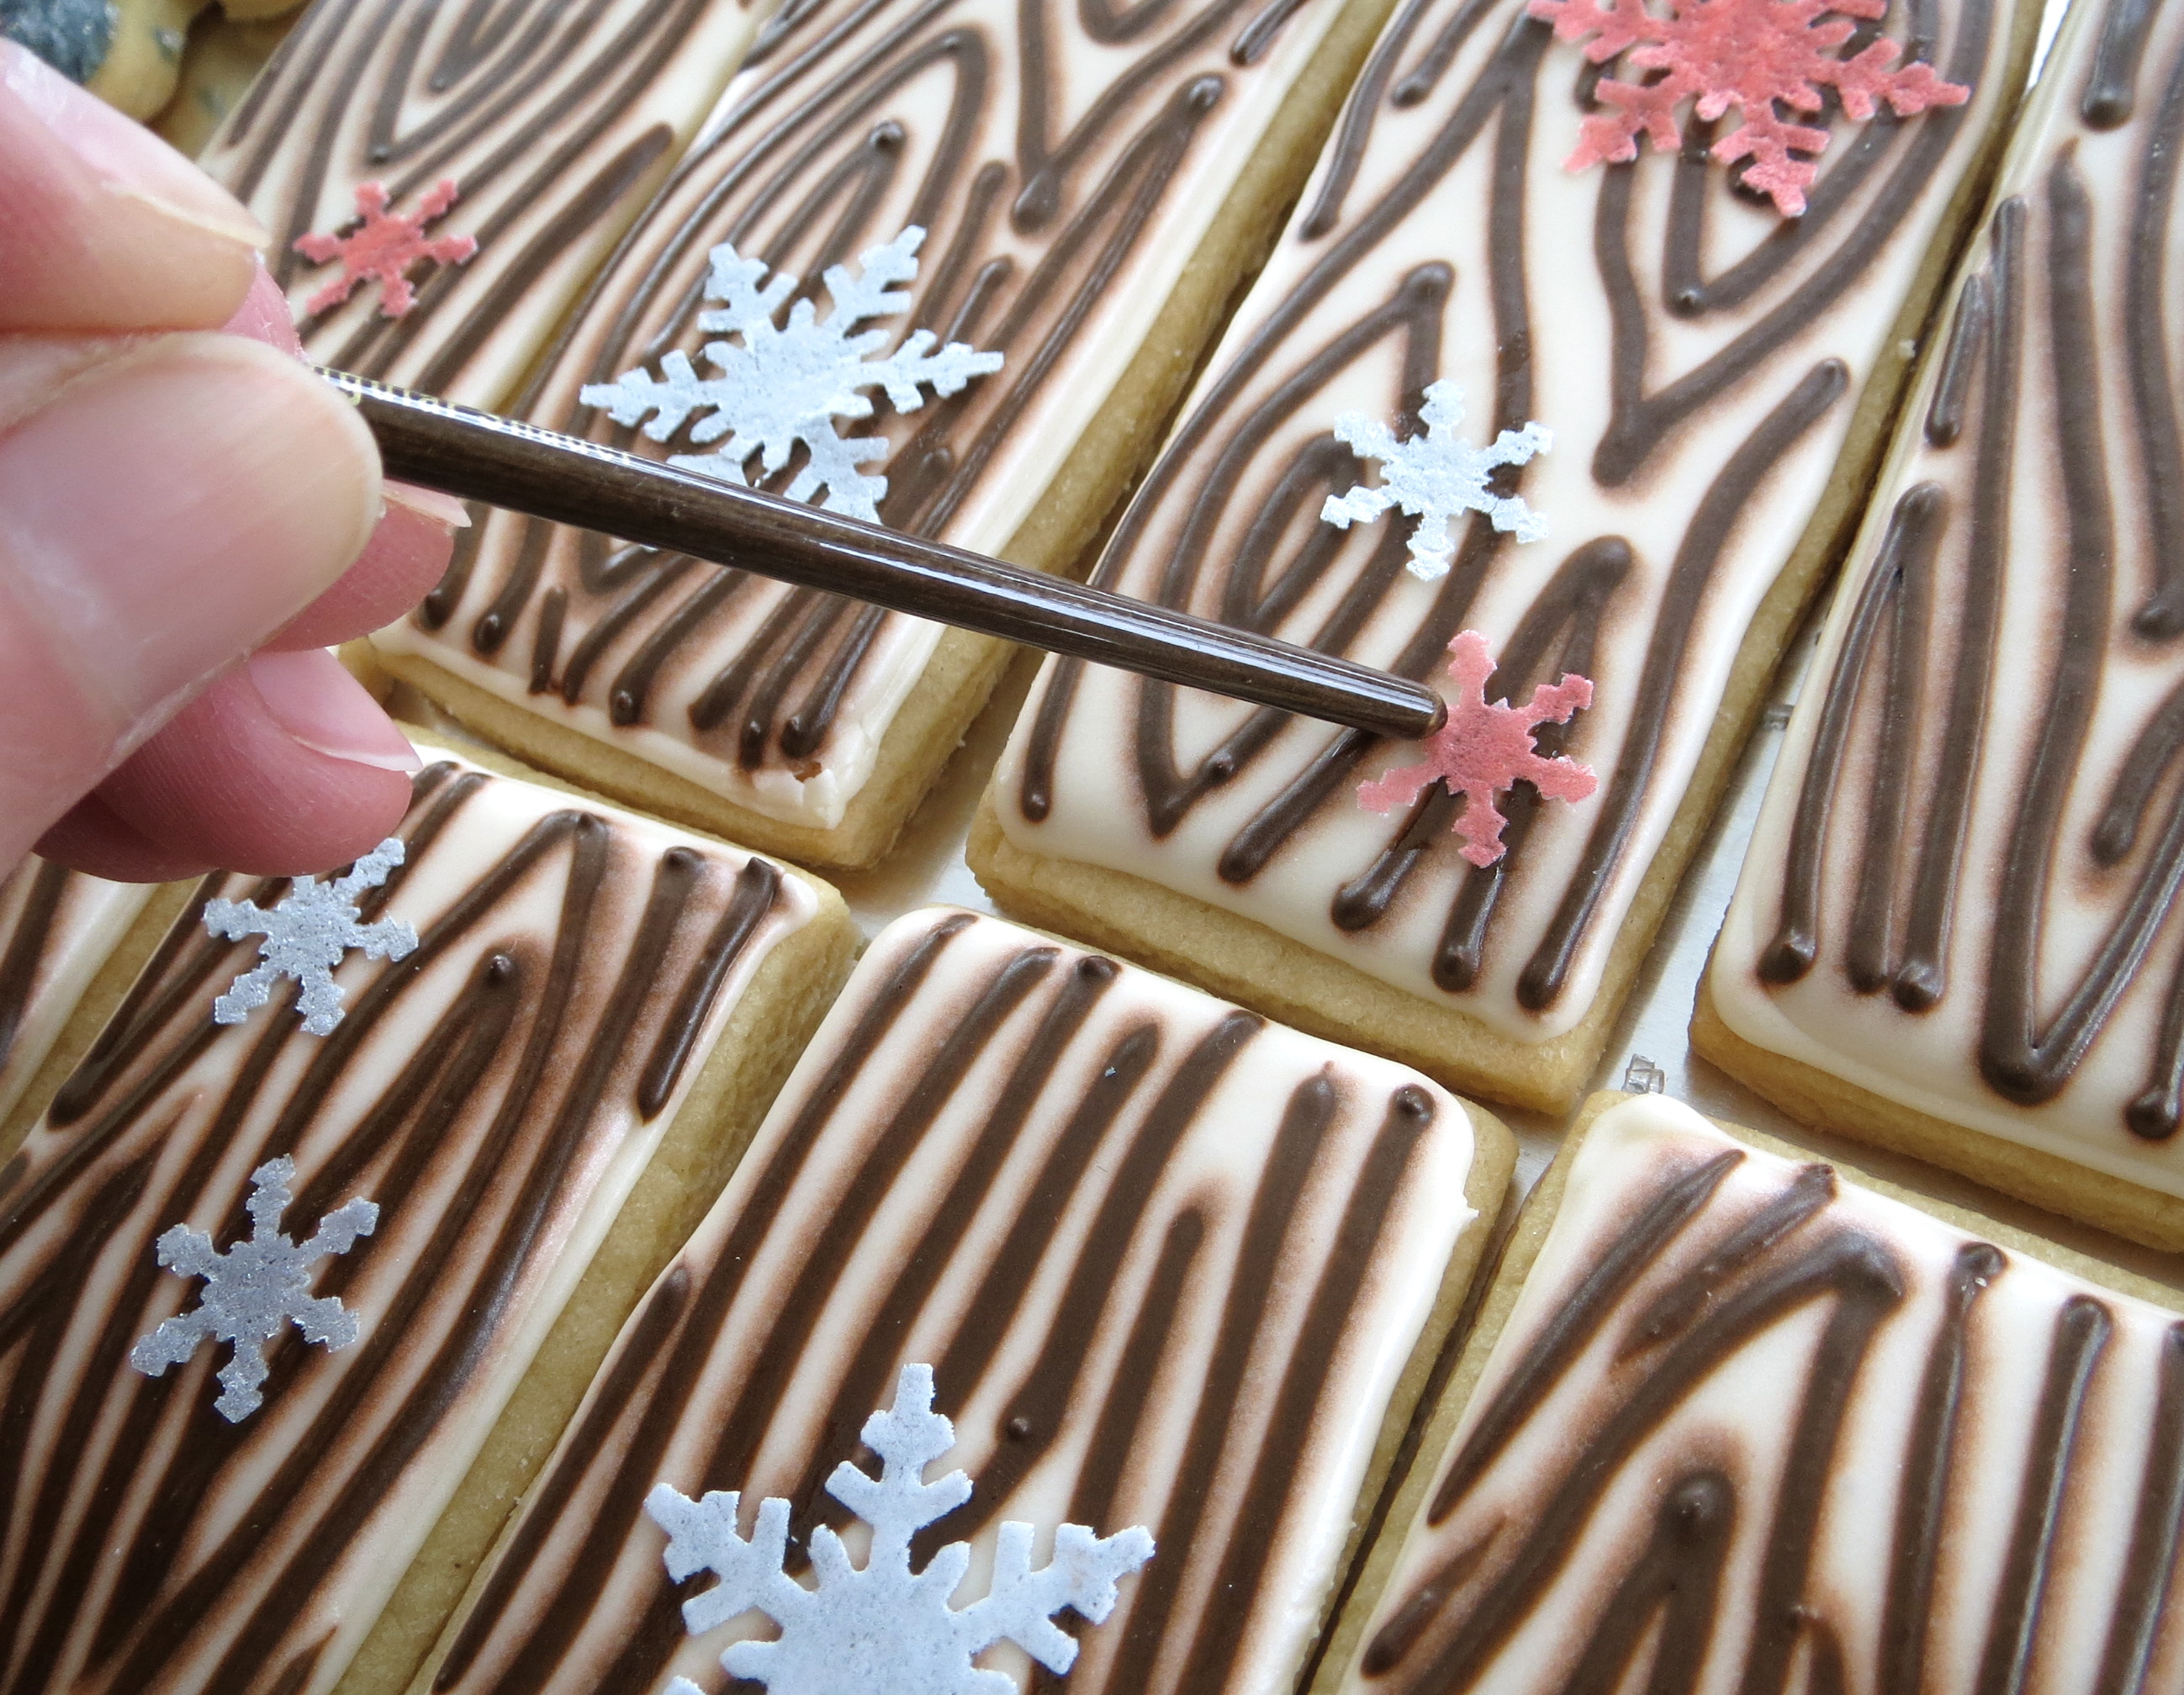
I adhered the snowflakes with a touch of corn syrup and my food-only paintbrush. The end of the brush helped to tack down the edges with a gentle tapping.
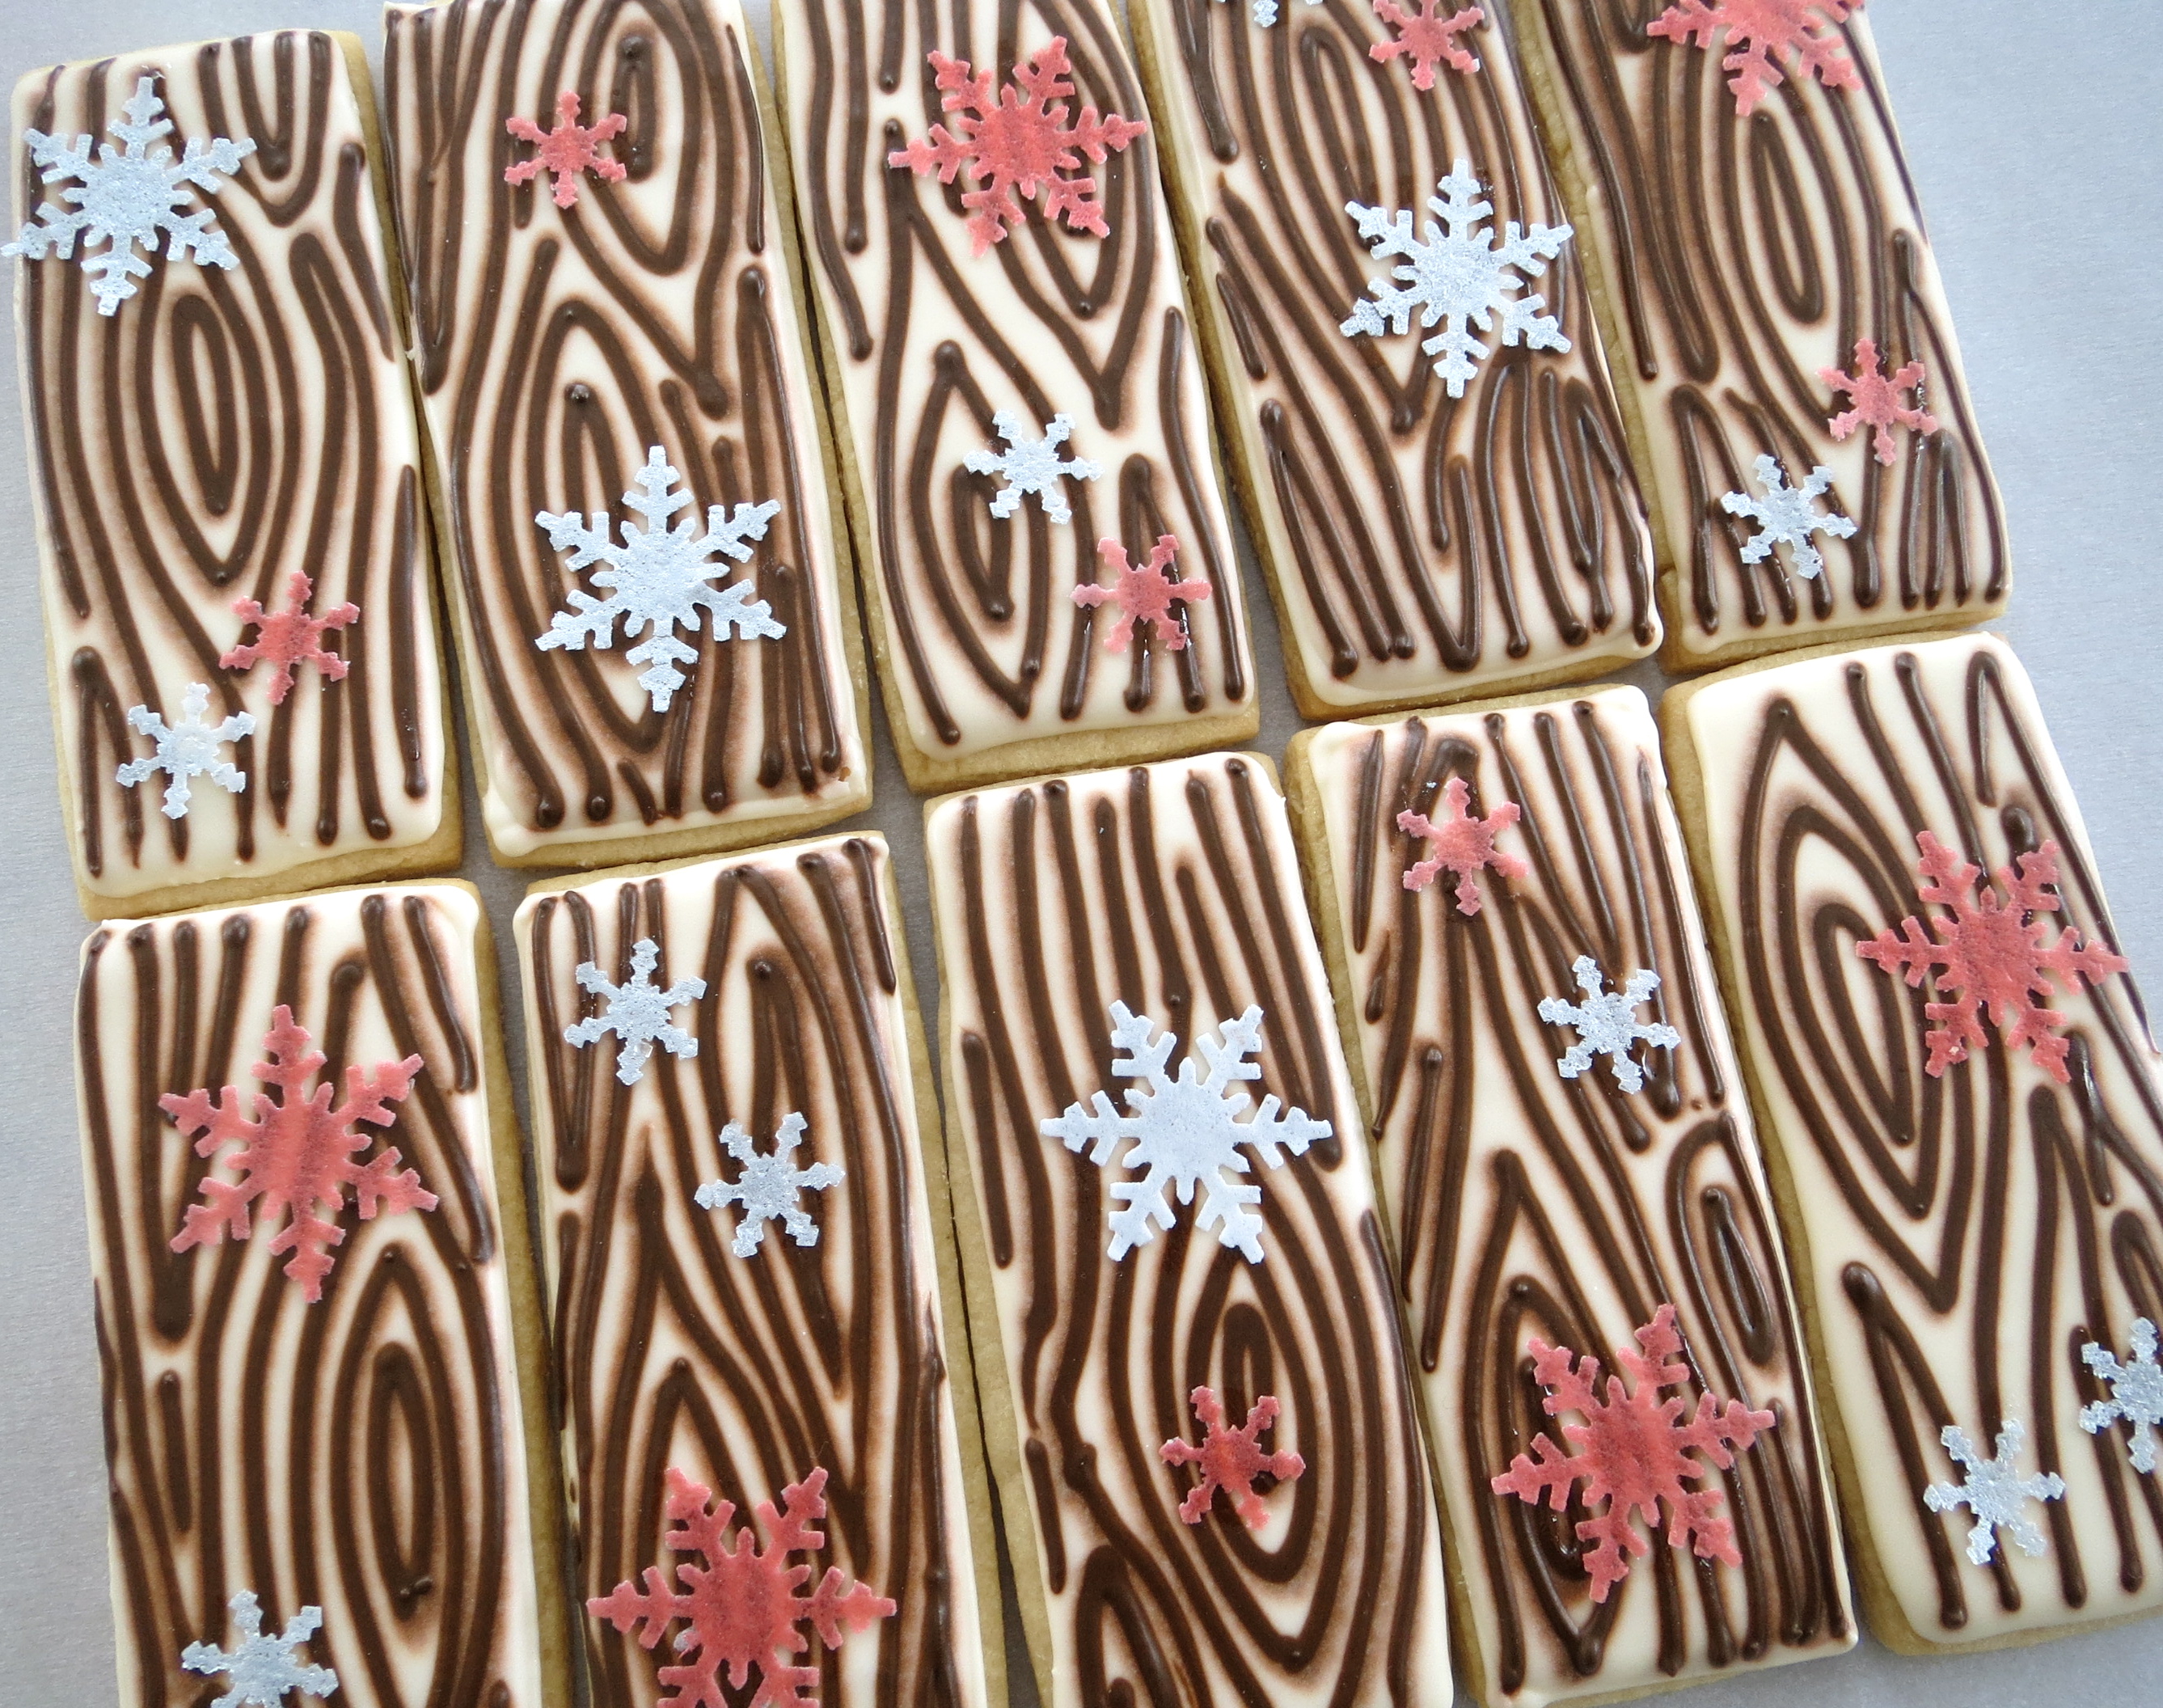
The result was a festive bed for my winter woodland hedgehog!
If you love a woodland Christmas theme as much as I do, make sure you check out my co-collaborator Hani and her Christmas owls. Aren’t they great?! She’s done a video tutorial on them as well, which makes it even easier to learn how to create them!

What a festive way to celebrate the winter holiday!


So amazingly cute!! And a great pair with Hani’s cookies!
Thanks, Rebecca! 🙂
So darn cute!!!
Such a perfect pair of cookies! The cuteness factor is off the charts! LOVE!!!
Thanks, Sue! Can’t wait to see what you did! 🙂
Thank you so much for doing this fun woodland collab with me. I love hedgehogs and you really captured them so well, totally adorable. I also love snowflakes, I really should look more into wafer paper, they are so pretty Hope you have a wonderful Christmas
Cuteness!!! Must be the year for woodland…I’m working on some right now too. Made your log slices…super easy!! Thanks for tutorials!! –Katy
Love the little hedgehogs- I’m totally into them & never thought of this. Thanks for a great tutorial!
So so cute and as you know, I couldn’t agree more about mixing one less icing color! All hail the CK black sugar pearls! lol. Love your hedgies and their sweet lashes 🙂
Adorable!!